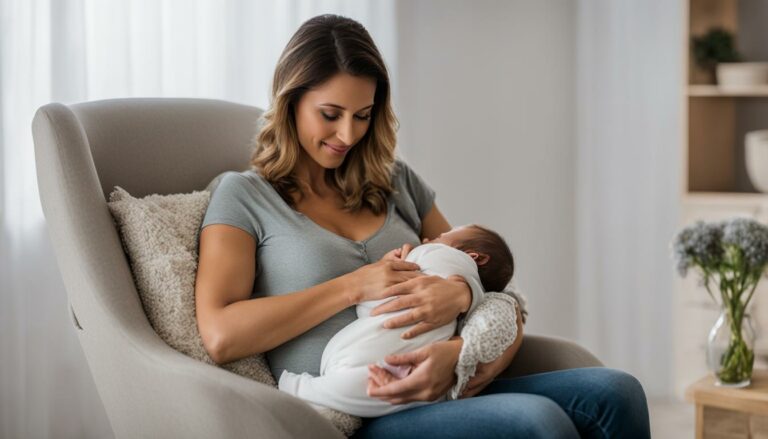
Craft Your Own DIY Pregnancy Pillow at Home

Eric Christie
Owner - Pillows and BedsheetsEric Christie stands as a luminary in the bedding industry, with a career spanning nearly four decades since the early 1980s. His journey through the world of bedding has seen him wear many hats – a manufacturer, designer, and retailer, showcasing his versatility and expertise in Read more...
pillowsandbedsheets.com and its partners may earn a commission if you purchase a product through one of our links
Creating a customized pregnancy pillow can provide optimal comfort during pregnancy. Follow these step-by-step instructions to make your own DIY pregnancy pillow at home.
Key Takeaways:
- A DIY pregnancy pillow offers several benefits, including customized support to the belly, hips, and back while sleeping.
- Making your own pregnancy pillow allows you to tailor it to your specific needs and preferences.
- Start by measuring the desired size of the gap in your pregnancy pillow.
- Rip the seam and gut the pillow to remove the stuffing.
- Mark and pin the fabric to prepare it for sewing.
With these simple steps, you can create a personalized and comfortable pregnancy pillow that will help you sleep better during this special time.
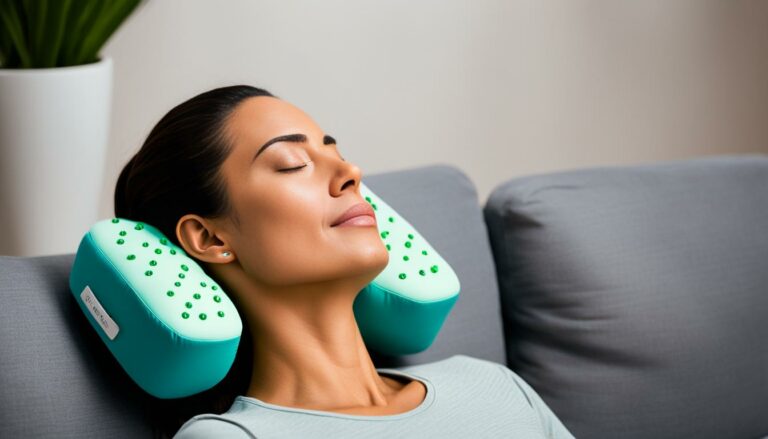
Benefits of a DIY Pregnancy Pillow
A DIY pregnancy pillow offers several benefits. It provides support to the belly, hips, and back while sleeping, helping to relieve body aches and discomfort. Making your own pregnancy pillow allows you to customize it to your specific needs and preferences. This sewing tutorial will guide you through the process of creating a personalized pregnancy pillow.
“A homemade pregnancy pillow provides the perfect combination of comfort and support for expectant mothers. By using quality materials and following a simple sewing tutorial, you can create a pillow that is tailored to your unique body shape and sleep preferences.”
– Sarah Thompson, DIY enthusiast
During pregnancy, many women experience discomfort and pain due to the changes in their bodies. The weight of the growing baby can strain the belly, hips, and back, leading to discomfort and restless nights. A DIY pregnancy pillow is designed to alleviate these issues by providing targeted support to these areas. By creating your own pregnancy pillow, you can adjust the size, shape, and firmness to suit your needs.
One of the main advantages of making your own pregnancy pillow is customization. Every woman is unique, and so are her pregnancy needs. By choosing the fabric, size, and filling of your homemade pregnancy pillow, you can ensure maximum comfort and support. Whether you prefer a softer or firmer pillow, a larger or smaller size, a homemade pregnancy pillow allows you to tailor it to your preferences.
Benefits of a DIY Pregnancy Pillow:
- Provides targeted support to the belly, hips, and back
- Relieves body aches and discomfort
- Customizable to your specific needs and preferences
- Allows for adjustments in size, shape, and firmness
- Provides a personalized sleep solution for expectant mothers
Making your own pregnancy pillow can also be a fulfilling and enjoyable DIY project. It allows you to unleash your creativity and create a unique item that is both practical and comfortable. Additionally, sewing your own pregnancy pillow can be a cost-effective alternative to purchasing a pre-made one.
| Benefits | Pre-made Pregnancy Pillow | DIY Pregnancy Pillow |
|---|---|---|
| Customization | Limited options | Endless possibilities |
| Cost | Higher price tag | Cost-effective |
| Fulfillment | Ready-made product | Personal achievement |
Step 1: Measure
To begin making your DIY pregnancy pillow, you’ll need to measure the desired size of the gap in the pillow. This step ensures that the pillow provides the right level of support and comfort for you. Here’s how to do it:
- Lie in bed and position a regular pillow in front and another behind yourself, creating a comfortable space.
- Note the distance between the two pillows as your measurement for the gap in your pregnancy pillow.
This measurement will serve as the basis for the size of the gap in your DIY pregnancy pillow, ensuring it fits your body perfectly. Now that you have the measurement, you’re ready to move on to the next step in creating your own pregnancy pillow.
Step 2: Rip the Seam and Gut the Pillow
Now it’s time to transform your regular pillow into a custom DIY maternity pillow. Take a seam ripper and carefully open up the seam on one of the long sides of the pillow. Start in the middle, right where the flat section of your pregnancy pillow will be. Make sure to create a hole large enough to fit your hands inside.
Once you’ve opened the seam, it’s time to separate the stuffing. We recommend dividing it into two halves and removing them from the pillow, making sure to keep the stuffing as intact as possible. This step is important to create the proper shape and support for your DIY maternity pillow.
Why Gutting the Pillow Is Necessary
Gutting the pillow allows you to customize the filling and density of your pregnancy pillow, providing the ideal level of comfort and support for your changing body.
Step 3: Mark and Pin
Now that you have your pillow “skin,” it’s time to mark and pin the center. To ensure proper alignment, measure the width of your pillow “skin” and find the middle point. Use a pencil and a straight edge to mark a line on either side of the flat portion of the pillow. These lines will guide you in sewing the pillow together.
Next, carefully pin the two halves of the “skin” together along the marked lines. This will keep the fabric in place during the sewing process and ensure a clean, straight seam. Make sure the pins are secure and evenly distributed to avoid any shifting or bunching of the fabric while sewing.
Take a moment to review your measurements and pinning job before proceeding to the next step. This will ensure that your DIY pregnancy pillow turns out just the way you envisioned it.
Continue with confidence as you move on to the next step in creating your own personalized pregnancy pillow.
Step 4: Follow the Lines
Sewing along the marked lines on the “skin” of the pregnancy pillow is the next step in creating your customized pillow.
Using a triple stitch will provide added strength to the seams, ensuring durability and longevity. This stitch is formed by sewing three parallel lines close together, creating a secure bond that will withstand regular use.
Pro Tip: If you plan to reattach any trim, leave a gap at the end of the seam to accommodate the trim. This will make the process of adding the finishing touches easier.
Alternatively, if you don’t have any trim to reattach, you can sew right to the end of the marked lines, folding the edges of the “skin” back together properly. This will create a neat and seamless look for your pregnancy pillow.
Remember to take your time and sew with precision, ensuring that the stitches are even and secure. Taking care during this step will result in a professional-looking DIY pregnancy pillow that you can be proud of.

| Step 4: Follow the Lines | |
|---|---|
| Materials | Tools |
|
|
Step 5: Stuff Your Pillow
Now it’s time to fill your homemade maternity pillow with plush, comfortable stuffing. Follow these simple steps to ensure your pillow is perfectly packed:
- Reverse the stuffing if desired: If you prefer a different texture or firmness, consider reversing the stuffing. This can provide a customizable experience and allow you to adjust the pillow’s support.
- Gather one end of the stuffing: Start by gathering one end of the stuffing and pushing it into the pillow as far as possible. This will ensure that the pillow is evenly filled from the top to the bottom.
- Continue to fill the pillow evenly: Gradually add the remaining stuffing to the pillow, making sure to distribute it evenly throughout. This will help maintain consistent support and prevent any lumps or unevenness.
Once you’ve finished stuffing your pillow, it’s ready to provide the comfort and support you’ve been longing for during your pregnancy journey.
Top Tips:
- Consider using a high-quality filling material, such as hypoallergenic polyester fiberfill or memory foam, for optimal comfort.
- Experiment with the amount of stuffing to achieve your desired level of firmness. You can always add or remove stuffing as needed.
- Ensure that the stuffing is evenly distributed throughout the pillow to maintain consistent support.
Now that your pillow is filled, let’s move on to the final steps to complete your DIY maternity pillow.
Step 6: Pin and Sew
Now that you have prepared the stuffing and attached the trim (if desired), it’s time to pin and sew the long side of your DIY maternity pillow back together.
Here’s how to do it:
- Start by folding the unfinished edges of the “skin” back in. Align them neatly to ensure a clean and professional-looking seam.
- If you plan to reattach any trim, pin it to one side of the pillow before pinning the other side. This will help you maintain the desired alignment.
- Using straight pins, secure the edges of the “skin” together along the seam line. Make sure the pins go through both layers of fabric to hold them firmly in place. Take care not to prick yourself!
- Now it’s time to sew the seam back together. You can choose to sew it by hand using a needle and thread, or use a sewing machine if you have one. Sew along the entire length of the pinned seam, removing the pins as you go.
- For added durability, consider reinforcing the seam by using a backstitch or a zigzag stitch.

Once you have completed the sewing, give your pillow a gentle shake to redistribute the stuffing and ensure it’s evenly distributed throughout the pillow. Take a moment to admire your handiwork, and now you have your very own DIY maternity pillow!
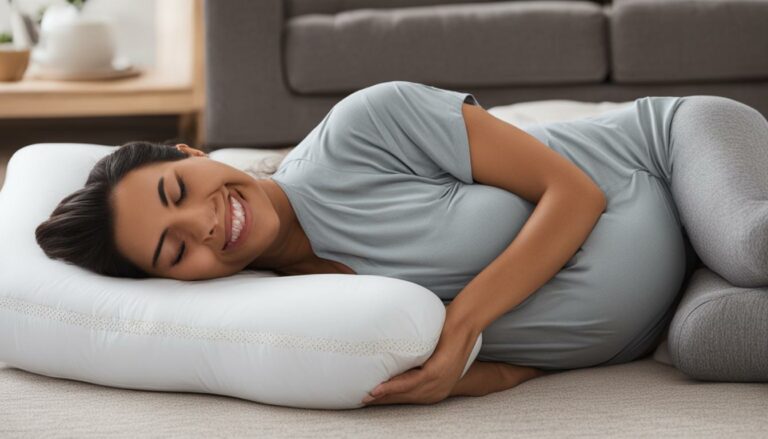
Step 7: All Done!
Your DIY pregnancy pillow is now complete! The finished pillow is firm with a gap in the middle for added comfort. The pillows may feel slightly firmer than expected initially but will compress with use. Enjoy the customized support and restful sleep provided by your handmade pregnancy pillow.
After following the step-by-step instructions and investing your time and effort in creating your own DIY pregnancy pillow, you’ve achieved a personalized and comfortable sleep accessory. The firmness of the pillow ensures proper support for your body, while the gap in the middle allows you to position it according to your comfort needs.
“A well-made DIY pregnancy pillow can be a game-changer for expecting mothers. It offers the freedom to customize the level of support and comfort, providing relief from discomfort and promoting better sleep.” – Sarah, a DIY enthusiast and mother of two.
As with any newly made pillow, you may notice that it feels slightly firmer at first. This is normal, and with regular use, the pillow will naturally compress, becoming more pliable and conforming to your body shape. Experiment with different positions and find the optimal way to utilize your handmade pregnancy pillow.
Testimonials from DIY Pregnancy Pillow Makers
| Name | Experience |
|---|---|
| Emily | “I made my own pregnancy pillow using a sewing tutorial, and it turned out to be a fantastic investment. I sleep better and wake up refreshed.” |
| Jessica | “The DIY pregnancy pillow I made not only saved me money, but it also provided customized support that I couldn’t find in store-bought pillows. It’s a must-try for all expecting mothers.” |
With your DIY pregnancy pillow now complete, you can look forward to nights of restful sleep and wake up feeling rejuvenated. Embrace the comfort and support offered by your homemade pregnancy pillow, knowing that it was crafted with love and tailored to your specific needs.
Other Designs for DIY Maternity Pillows
When it comes to creating your own DIY maternity pillow, there are endless possibilities for designs and styles. Let your creativity soar as you consider different shapes, sizes, and patterns to make a pregnancy pillow that suits your preferences perfectly.
Experiment with various fabrics and fillings to create a unique DIY maternity pillow that provides optimal comfort and support throughout your pregnancy journey. Whether you prefer a plush and fluffy pillow or a firmer one with added density, the choice is yours to make.
Remember, the key is to tailor the pillow to your specific needs, ensuring maximum relaxation and restful sleep.
“The beauty of DIY maternity pillows is that you have the freedom to customize every detail, from the fabric to the filling. Let your imagination run wild and create a pillow that truly complements your style and offers the comfort you deserve.” – Amanda Thompson, DIY Home Decor Enthusiast
Consider these additional design ideas to inspire your DIY maternity pillow project:
- For added height and support, incorporate fabric strips along the sides or bottom of the pillow.
- If your original pillow had any decorative trim, repurpose it by attaching it to your new maternity pillow.
- Before stuffing the pillow, wash the pillow “skin” to remove any pencil markings or lines.
- If you prefer a larger pillow, consider using a king-size pillowcase to cover the finished product.
Now it’s time to unleash your creativity and embark on your DIY maternity pillow adventure. Craft a pregnancy pillow that not only provides the support you need but also reflects your personal style and taste.
Remember to enjoy the process and embrace the comfort of your homemade maternity pillow.
| Design | Description |
|---|---|
 |
A unique, crescent-shaped pillow that provides excellent support to the belly and back, ensuring a comfortable sleep position. |
| A U-shaped pillow that cuddles your entire body, providing support to the neck, shoulders, back, and hips. | |
|
A wedge-shaped pillow that can be used to elevate different parts of the body, depending on your comfort needs. |
Additional Tips and Ideas
Take your DIY maternity pillow project to the next level with these helpful tips and creative ideas:
- Consider adding extra height to your pillow by incorporating fabric strips. This will provide additional support and comfort.
- If your original pillow had any decorative trim, you can reattach it to the new pillow for a personalized touch.
- Before stuffing the pillow, wash the “skin” fabric to remove any pencil lines or markings, ensuring a clean and finished appearance.
- Once your pillow is complete, use a king-size pillowcase to cover it, providing an extra layer of protection and easy maintenance.
These tips and ideas will help you enhance your DIY maternity pillow project and create a functional and customized pillow that meets your specific needs. Get creative and enjoy the process of designing a pregnancy pillow that provides optimal support and comfort throughout your pregnancy.
Here’s an inspiring quote for your DIY journey:
“The joy of creating something with your own hands is unparalleled. Dive into this easy pregnancy pillow project and experience the satisfaction of crafting a functional and personalized accessory for your pregnancy journey.”
Stay tuned for the final section, where we wrap it all up and provide a conclusion to your DIY pregnancy pillow adventure.
Conclusion
Creating your own DIY pregnancy pillow allows you to customize the size, shape, and comfort level to suit your needs. By following the step-by-step instructions provided in this article, you can enjoy the benefits of a personalized pregnancy pillow that supports your body during this special time.
Rest well and embrace the comfort of your homemade pregnancy pillow. Whether you prefer a firmer pillow or a softer one, you have the flexibility to adjust the filling to your liking. This level of customization ensures that you will have a restful sleep throughout your pregnancy.
Don’t settle for generic pregnancy pillows when you can craft your own unique design. Making a DIY pregnancy pillow allows you to create a supportive and comfortable sleeping experience tailored to your body’s needs. Start your DIY project today and enjoy the blissful rest provided by your handmade pregnancy pillow!
FAQ
What are the benefits of a DIY pregnancy pillow?
A DIY pregnancy pillow provides support to the belly, hips, and back while sleeping, helping to relieve body aches and discomfort. Making your own pregnancy pillow allows you to customize it to your specific needs and preferences.
How do I measure for a DIY pregnancy pillow?
Lie in bed and place a regular pillow in front and behind yourself in a comfortable position. Note the distance between the two pillows as the measurement for the gap in your DIY pregnancy pillow.
What is the first step in making a DIY pregnancy pillow?
The first step is to measure the desired size of the gap in your pregnancy pillow.
What do I do after measuring for my DIY pregnancy pillow?
After measuring, use a seam ripper to open up the seam on one of the long sides of a regular pillow and remove the stuffing.
How do I mark and pin the “skin” of my DIY pregnancy pillow?
Measure your pillow “skin” and determine the center. Use a pencil and straight edge to mark a line on either side of the flat portion of the pillow. Pin the two halves of the “skin” together along the marked lines.
What is the next step after marking and pinning the “skin” of my DIY pregnancy pillow?
The next step is to sew along the marked lines on the “skin” of the pillow using a triple stitch for added strength.
How do I stuff my DIY pregnancy pillow?
Re-stuff the pillow, making sure to reverse the stuffing if desired. Start by gathering one end of the stuffing and pushing it in as far as possible, then continue to fill the pillow evenly.
How do I sew the seam of my DIY pregnancy pillow?
Pin the long side of the pillow back together, folding the unfinished edges of the “skin” back in as you pin. Sew the seam back together, either by hand or using a machine.
What are some other designs for DIY maternity pillows?
There are various designs and styles for DIY maternity pillows that you can explore. Consider different shapes, sizes, and patterns to create a pregnancy pillow that suits your preferences.
Do you have any additional tips and ideas for making a DIY maternity pillow?
Yes! Consider adding extra height with fabric strips, reattach any trim from the original pillow, wash the pillow “skin” to remove pencil lines before stuffing, and use a king-size pillowcase to cover the finished pillow.
How can I personalize my DIY pregnancy pillow?
By following these simple instructions, you can create a personalized pregnancy pillow that supports your body during this special time. Rest well and embrace the comfort of your handmade pregnancy pillow.
Eric Christie stands as a luminary in the bedding industry, with a career spanning nearly four decades since the early 1980s. His journey through the world of bedding has seen him wear many hats – a manufacturer, designer, and retailer, showcasing his versatility and expertise in Read more...