DIY Guide: How to Make a Bolster Pillowcase

Eric Christie
Owner - Pillows and BedsheetsEric Christie stands as a luminary in the bedding industry, with a career spanning nearly four decades since the early 1980s. His journey through the world of bedding has seen him wear many hats – a manufacturer, designer, and retailer, showcasing his versatility and expertise in Read more...
pillowsandbedsheets.com and its partners may earn a commission if you purchase a product through one of our links
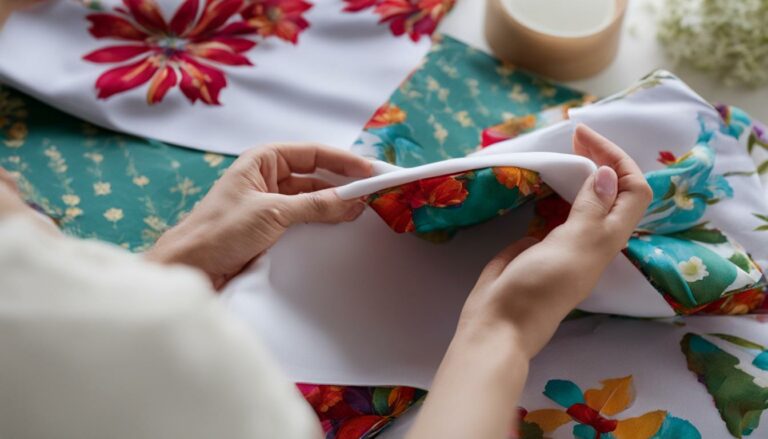
Bolster pillows can add drama to your bedroom or serve as decorative accents on your couch or chairs. Making your own bolster pillowcases is a fun and easy DIY project that allows you to customize your home decor. In this guide, we will provide step-by-step instructions on creating a stylish bolster pillowcase.
Key Takeaways:
- Making your own bolster pillowcase is a creative and affordable way to personalize your home decor.
- You can choose from a variety of fabrics, trims, and design ideas to create a unique bolster pillow.
- Follow our step-by-step instructions to make your own stylish bolster pillowcase.
- Consider using alternative methods like using pre-made inserts or hand-sewing techniques.
- Embrace your creativity and enjoy the process of crafting your own bolster pillowcases.
Supplies Needed for Making a Bolster Pillowcase
To make a bolster pillowcase, you will need the following supplies:
- Fabric: Choose a fabric that suits your style and complements your home decor. Consider the color, texture, and durability of the fabric.
- Trim (optional): If you want to add a decorative touch to your bolster pillowcase, select a trim that complements the fabric. Trims like pom poms or piping can add a unique and stylish look.
- Loose batting or Poly-fil: This filling material adds softness and shape to your bolster pillowcase. Choose a material that suits your comfort preferences.
- Straight pins: These pins will help you secure the fabric and trim in place while sewing.
- Darning needle: You’ll need this needle to close the open end of the pillowcase with a slip-stitch technique.
- Thread to match the fabric: Choose a thread color that matches the main color of your fabric for a seamless finish.
- Sewing machine: A sewing machine will make the sewing process faster and more efficient. Ensure that your machine is in good working condition before starting the project.
These supplies can be easily found at a fabric store or online, making it convenient to gather everything you need for your bolster pillowcase project.
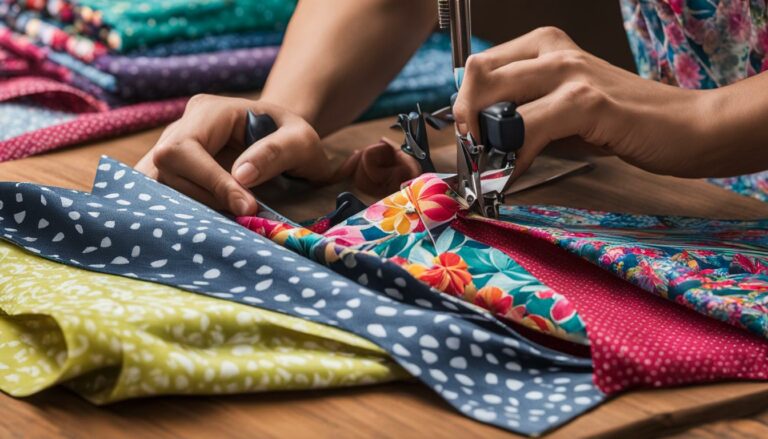
Choosing the Right Fabric and Trim for Your Bolster Pillowcase
When it comes to creating a beautiful bolster pillowcase, the fabric you choose plays a crucial role in determining the overall look and feel of the final product. To make your bolster pillowcase truly stand out, consider the color scheme and style of your room. By carefully selecting the fabric and trim, you can create a stunning accent piece that complements your existing decor.
If you prefer a timeless and elegant look, opt for a solid color fabric that seamlessly blends with your room’s color palette. This choice allows the pillowcase to effortlessly blend in while adding a touch of sophistication to your space. On the other hand, if you want to make a bold statement, consider using a patterned fabric with eye-catching designs. Play with different patterns and motifs to infuse your room with personality and visual interest.
Additionally, don’t forget about the trims! Adding trims like pom poms or piping can elevate the design of your bolster pillowcase. Choose trims that harmonize with your fabric selection and enhance the overall aesthetic. Pom poms can create a playful and whimsical vibe, while piping adds a tailored and polished look. Get creative and experiment with different trim options to find the perfect combination that suits your style.
If you’re looking for some design inspiration, here are a few ideas to consider:
- Create a coastal theme with a fabric adorned with seashells or anchors and complement it with a rope trim.
- Add an exotic touch to your space with a vibrant fabric featuring intricate patterns and pair it with a tassel trim.
- Embrace a bohemian aesthetic by using a fabric with vibrant colors and geometric prints, accentuated with pompom trims.
Remember, the goal is to create a bolster pillowcase that reflects your personal taste and complements the overall decor of your room. With thoughtful fabric and trim choices, you can transform a simple bolster pillow into a stylish and eye-catching accent piece.

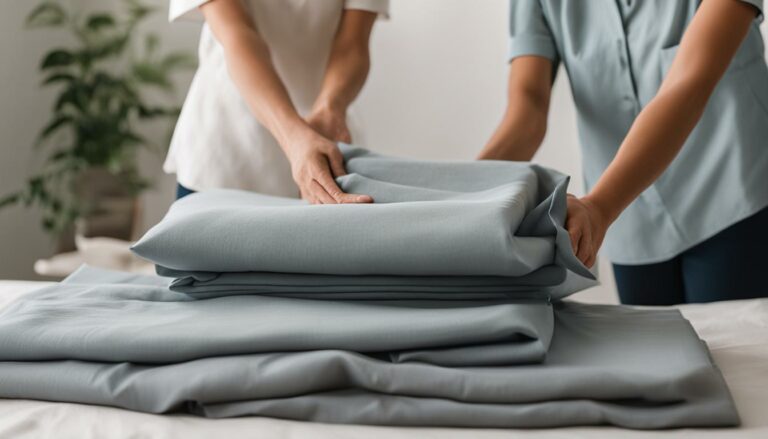
Measuring and Cutting the Fabric for Your Bolster Pillowcase
Now that you have chosen the perfect fabric and trim for your bolster pillowcase, it’s time to measure and cut the fabric to create your custom pillowcase. Follow these simple steps to ensure a perfect fit:
- Measure the desired circumference: Start by measuring the circumference of your pillow using a flexible measuring tape. Make sure to wrap the tape around the thickest part of the pillow to get an accurate measurement.
- Example: If your pillow measures 30 inches in circumference, add 1 inch to account for the hem allowance.
- Calculate the fabric length: Take the measured circumference and add 1 inch for the hem allowance. This will be the length of your fabric.
- Example: If your pillow has a circumference of 30 inches, the fabric length should be 31 inches.
- Cut the fabric: Using fabric scissors, cut a strip of fabric with the calculated length. Ensure that the long side of the bolster pillow runs parallel to the width of your fabric.
- Example: Cut a strip of fabric that is 31 inches long and the width of your fabric.
- Cut the end caps: To create the end caps of your bolster pillowcase, cut out two circular pieces of fabric. The diameter of the circles should match the width of the bolster pillow.
- Example: If your pillow is 10 inches wide, cut two circular pieces of fabric with a 10-inch diameter.
Once you have measured and cut the fabric, you are ready to move on to the next step in creating your beautiful bolster pillowcase.
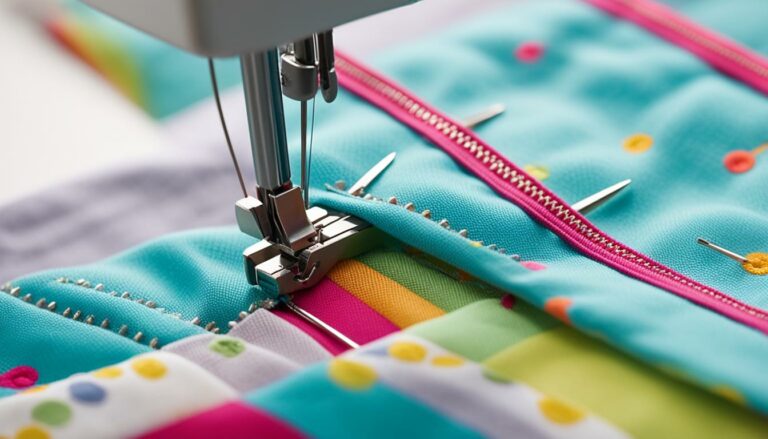
Attaching Trim to the Fabric
Now that you have your fabric ready, it’s time to add a decorative touch to your bolster pillowcase by attaching trim. Trim, such as pom poms or piping, can enhance the overall aesthetic and make your pillowcase stand out.
To attach the trim, follow these steps:
- Pin the trim to the ends of the fabric, ensuring that the finished edge of the trim is facing inward.
- Using a sewing machine or a needle and thread, stitch the trim into place. Be careful not to get too close to the edge of the fabric to prevent the thread from showing.
Attaching the trim is a simple yet effective way to elevate the look of your bolster pillowcase. The decorative elements will add charm and personality to your finished project.

Enhancing Your Design with Stitching Pom Poms
If you’ve chosen pom poms as your trim, consider stitching them in a decorative pattern to create a unique and eye-catching design. The colorful and fluffy pom poms will add texture and playfulness to your bolster pillowcase.
Tip: Experiment with different stitching techniques like zigzag or decorative stitches to create interesting patterns with your pom poms.
Securing the Trim with Quality Stitches
When stitching the trim to the fabric, make sure to use quality stitches that will securely hold the trim in place. This will ensure that the trim remains intact even with regular use and washing.
Pro Tip: If you’re using a sewing machine, adjust the stitch length and tension according to the thickness of the trim and fabric for optimal results.
By attaching trim to your bolster pillowcase, you can personalize your home decor and add a touch of elegance or playfulness, depending on your design choices. Let your creativity shine through as you experiment with different trims and stitching techniques!
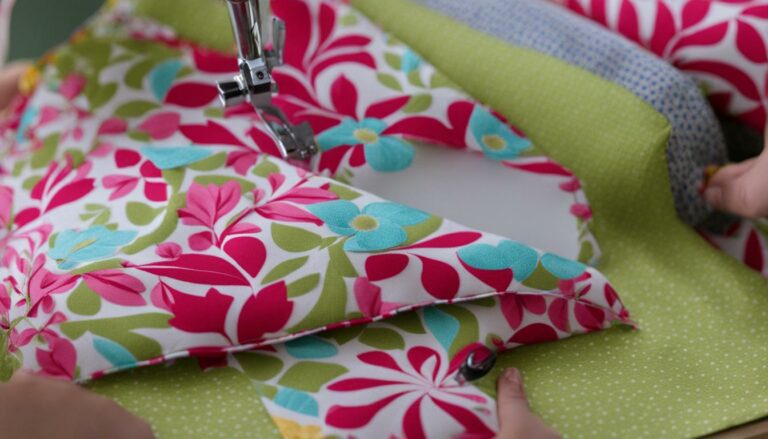
Sewing the Fabric Together
Now that you have your fabric prepared, it’s time to start sewing the bolster pillowcase together. Follow these easy steps to create a sturdy and beautiful finished product.
- Fold the fabric: Take your fabric and fold it in half, ensuring that the right sides are facing inward. This will create a long tube-like shape for your pillowcase.
- Pin the folded fabric: Use straight pins to secure the folded fabric in place at the raw edge. This will keep the fabric aligned and prevent it from shifting during the sewing process.
- Stitch the pinned edge: Using a sewing machine, stitch along the pinned edge of the fabric, about 1/2″ from the edge. Make sure to use a straight stitch and sew securely to ensure the durability of your bolster pillowcase.

This stitching will create the tube that will hold the stuffing for your bolster pillow. By folding and stitching the fabric in this way, you are creating a strong and seamless seam for a professional-looking finish.
Now that you’ve sewn the fabric together, your bolster pillowcase is starting to take shape! In the next section, we will move on to adding the end caps to complete the pillowcase. Stay tuned!
Adding the End Caps to the Bolster Pillowcase
Once you have stitched the main fabric of your bolster pillowcase and attached any trim, it’s time to add the end caps to give your pillow a polished finish. Follow these steps:
- Use a round object, such as a plate or bowl, as a template to cut out two circular pieces of fabric for the end caps. Make sure the size of the circles matches the diameter of your bolster pillow.
- Place one circular piece of fabric on each end of the pillow sleeve, with the wrong sides facing out and the right sides facing each other.
- Align the edges of the circular fabric with the raw edges of the pillow sleeve, matching them up carefully.
- Pin the end pieces onto the pillow sleeve, adjusting the pins as needed to ensure a snug fit.
- Using a sewing machine or a needle and thread, stitch the end caps onto the pillow sleeve, following the shape of the circular pieces of fabric. Leave one end cap halfway stitched to create an opening for stuffing.
By adding the end caps, you create a clean and professional look for your bolster pillowcase. This technique ensures that your pillow will hold its shape and withstand regular use.

Stuffing and Closing the Bolster Pillowcase
Now that you’ve finished sewing the fabric together, it’s time to bring your bolster pillowcase to life. Follow these steps to stuff and close your pillow with a clean and polished finish.
Step 1: Flip the Pillow Right-Side-Out
After sewing the fabric tube, carefully turn it inside out to reveal the right side of the fabric. This will ensure that the seams are hidden and the finished side is showing on the outside.
Step 2: Fill the Pillow with Batting
Next, fill the bolster pillowcase with batting, making sure to distribute it evenly for a smooth and plump appearance. Add as much or as little batting as desired to achieve the desired level of firmness.
Bolster Pillow Pro Tip: To ensure that the batting fills the corners and ends of the pillow, use your hands to gently push it into place and smooth out any lumps or unevenness.
Step 3: Use the Slip-Stitch Technique to Close the Pillow
To close up the open end of the bolster pillowcase, employ the slip-stitch technique. This method creates an invisible seam, resulting in a clean and polished look.
Slip-Stitch Technique: Take a darning needle and thread it with a color that matches your fabric. Insert the needle into the folded edge of the fabric, picking up a few threads. Then, insert the needle across the opening, catching only a few threads on the opposite side. Continue moving across the opening, taking small stitches and catching only a few threads on each side. This will create an almost invisible seam that will hold the batting in securely.
If you’re new to slip-stitching, don’t worry! There are many helpful resources available, such as YouTube tutorials, that can guide you through the technique step-by-step.
Once you’ve completed the slip-stitching, your bolster pillowcase is ready to be admired and enjoyed. Place it on your bed, couch, or favorite chair to add a touch of style and comfort to your space.
| Steps to Stuff and Close the Bolster Pillowcase |
|---|
| 1. Flip the Pillow Right-Side-Out |
| 2. Fill the Pillow with Batting |
| 3. Use the Slip-Stitch Technique to Close the Pillow |
Customizing Your Bedroom Decor with Bolster Pillows
Bolster pillows can be a great starting point for decorating your bedroom. When choosing fabric for your bolster pillowcase, take into consideration the color and style of your walls and bedding. Coordinating with the wall color can create a cohesive and harmonious look, while opting for a plain white duvet cover can provide a striking contrast. Embrace your creativity and explore different design ideas to personalize your space and enhance your bedroom decor.
Choosing the Right Color
When selecting fabric for your bolster pillowcase, think about the overall color scheme of your bedroom. Consider whether you want the bolster pillows to blend in with the wall color or stand out as an accent. A bolster pillowcase in a similar shade as your walls can create a calming and seamless look, while a contrasting color can add a pop of excitement and visual interest.
Coordinating with Your Bedding
Your bolster pillowcase can also be coordinated with your bedding to create a cohesive look. If you have a patterned duvet cover, opt for a solid color fabric that complements the dominant hue in the pattern. On the other hand, if your duvet cover is plain, you have the freedom to choose a bolster pillowcase in a color that matches your personal style or adds a bold statement to your bed.
Enhancing with Contrasting Colors
A contrasting duvet cover can provide a striking backdrop for your bolster pillows. For example, if your walls and bedding are white or neutral, a bold and vibrant bolster pillowcase can add a pop of color and personality to your bedroom decor. Don’t be afraid to mix and match colors and patterns to create a visually stunning and personalized space.
Personalizing Your Space
Bolster pillows offer endless possibilities for personalization in your bedroom decor. You can choose fabrics with patterns or textures that reflect your individual style, whether it’s a playful floral print or a luxurious velvet fabric. Consider the overall aesthetic you want to achieve and select fabrics and patterns that resonate with your personal taste.
Creating a Cozy Vibe
Bolster pillows can enhance the cozy ambiance of your bedroom. Consider using soft, plush fabrics like faux fur or velvet for your bolster pillowcase. These materials add a touch of luxury and comfort to your space, making it inviting and cozy.
| Pros of Coordinating with Wall Color | Pros of Contrasting with Duvet Cover |
|---|---|
|
|
Quick and Easy Bolster Pillow Tutorial
If you’re looking for a fast DIY bolster pillow project, we’ve got a simple solution for you. With just a few materials and easy step-by-step instructions, you’ll have a stylish bolster pillow in no time.
Materials Needed:
- Towel
- Rubber bands
- Fabric or scarf
- Safety pins
Step-by-Step Instructions:
- Start by rolling the towel tightly to create the core of your bolster pillow.
- Secure the rolled towel with rubber bands to hold its shape.
- Next, take the fabric or scarf and wrap it around the rolled towel, covering it completely.
- Use safety pins to secure the fabric or scarf in place, making sure it is snug and doesn’t slip.
That’s it! Your fast DIY bolster pillow is now complete and ready to be enjoyed. This no-sew method allows you to create a temporary bolster pillow cover that can be easily changed to match your seasonal decor. Experiment with different fabric patterns and colors to add a personalized touch to your home.
Enjoy the simplicity and versatility of this quick and easy bolster pillow tutorial. Whether you need extra support while lounging or want to enhance the look of your living space, this DIY project is a great way to accomplish both.
Alternative Methods for Making Bolster Pillowcases
In addition to the sewing method described earlier, there are alternative ways to make bolster pillowcases. These methods provide flexibility and allow you to experiment with different techniques. Whether you prefer using pre-made inserts or exploring the art of hand-sewing, there are options to suit your skills and preferences.
Using Pre-Made Inserts
If you’re looking for a quicker and more convenient approach, using pre-made bolster pillow inserts is a great option. These inserts are readily available in various sizes and materials, allowing you to select the perfect fit for your pillow. Simply choose a fabric that matches your style, and customize the cover to fit the insert. This method saves time and eliminates the need for extensive sewing.
Hand-Sewing Techniques
If you enjoy the art of hand-sewing and want to add a personal touch to your bolster pillowcase, there are simple techniques you can explore. One method involves rolling a towel tightly and securing it with stitches or safety pins. Then, wrap a fabric or scarf around the towel to create a decorative cover. This approach allows you to easily change the fabric cover whenever you desire, giving you the opportunity to refresh your home decor.
Hand-sewing can also involve stitching a fabric sleeve and filling it with loose batting or Poly-fil to create a custom bolster pillow shape. This technique offers a hands-on and creative experience, allowing you to experiment with different fabrics and designs.
Whichever alternative method you choose, the key is to explore different possibilities and find the approach that best suits your style, skills, and preferences.
| Method | Description |
|---|---|
| Using Pre-Made Inserts | Utilize pre-made bolster pillow inserts and customize the fabric cover. This method saves time and is convenient for those who prefer a quicker approach. |
| Hand-Sewing Techniques | Experiment with hand-sewing techniques like rolling a towel inside fabric and securing it with stitches or safety pins. This allows for easy customization and the ability to change covers whenever desired. |
Embrace Your Creativity with Bolster Pillow Making
Are you looking for a fun and creative way to enhance your home decor? Look no further than bolster pillow making. This DIY project allows you to showcase your unique style and transform the look of your living space. With a wide range of fabric choices, trims, and design ideas, you can easily change the appearance of your bolster pillows to match different seasons or moods.
One of the best things about making bolster pillowcases is that it offers an affordable way to update your home decor without breaking the bank. By changing the pillow covers, you can instantly refresh the look of your room. Whether you prefer a minimalistic design or a vibrant pattern, there are endless possibilities to explore.
The process of crafting bolster pillows is not only enjoyable but also allows you to express your personal style. From selecting the perfect fabric to adding decorative trims, each step allows you to put your creativity to work. Whether you’re a seasoned crafter or a beginner, bolster pillow making is a great way to unleash your artistic side and add a personalized touch to your home.
So why wait? Dive into the world of bolster pillow making and let your imagination run wild. Transform your home decor, create a cozy atmosphere, and impress your guests with your unique creations. Enjoy the process and embrace the endless possibilities that come with bolster pillow making.
FAQ
What supplies do I need to make a bolster pillowcase?
To make a bolster pillowcase, you will need fabric, trim (optional), loose batting or Poly-fil, straight pins, a darning needle, thread to match the fabric, and a sewing machine.
How do I choose the right fabric and trim for my bolster pillowcase?
When selecting fabric for your bolster pillowcase, consider the color scheme and style of your room. Trims like pom poms or piping can be added for a decorative touch.
How do I measure and cut the fabric for my bolster pillowcase?
To measure the fabric, determine the desired circumference of your pillow and add 1 inch for the hem allowance. Cut the fabric to this measurement and cut out two circular pieces of fabric for the end caps of the pillow.
How do I attach trim to the fabric?
Pin the trim to the ends of the fabric, making sure the finished edge of the trim is facing inward. Stitch the trim into place, being careful not to get too close to the edge to prevent the thread from showing.
How do I sew the fabric together to create the bolster pillowcase?
Fold the fabric in half with right sides facing inward and pin the folded fabric into place at the raw edge. Stitch along the pinned edge, about 1/2″ from the edge, to create the tube that will hold the stuffing.
How do I add the end caps to the bolster pillowcase?
Use the circular pieces of fabric you cut earlier as the end caps. Pin them onto the pillow sleeve with the wrong sides facing out and the right sides facing each other. Stitch the end caps, leaving one partially stitched to allow for stuffing.
How do I stuff and close the bolster pillowcase?
Flip the pillow right-side-out and fill it with batting, ensuring even distribution. Use a darning needle and the slip-stitch technique to close up the open end of the pillow.
How can I customize my bedroom decor with bolster pillows?
Consider the color and style of your walls and bedding when choosing fabric for your bolster pillowcase. Coordinate with the wall color or create contrast with a plain white duvet cover.
Is there a quick and easy way to make a bolster pillow?
Yes, you can use a towel as the main fabric. Simply roll the towel tightly and secure it with rubber bands. Then, wrap a fabric or scarf around the towel and secure it with safety pins.
Are there alternative methods for making bolster pillowcases?
Yes, you can use pre-made bolster pillow inserts and customize the fabric cover, or use hand-sewing techniques like rolling a towel inside fabric and securing it with stitches or safety pins.
What can bolster pillow making offer in terms of creativity and home decor?
Making bolster pillowcases allows you to showcase your creativity and transform your home decor. With various fabric choices, trims, and design ideas, you can change the look of your bolster pillows to match different seasons or moods.
Eric Christie stands as a luminary in the bedding industry, with a career spanning nearly four decades since the early 1980s. His journey through the world of bedding has seen him wear many hats – a manufacturer, designer, and retailer, showcasing his versatility and expertise in Read more...