Easy DIY Pillowcase Covers Tutorial

Eric Christie
Owner - Pillows and BedsheetsEric Christie stands as a luminary in the bedding industry, with a career spanning nearly four decades since the early 1980s. His journey through the world of bedding has seen him wear many hats – a manufacturer, designer, and retailer, showcasing his versatility and expertise in Read more...
pillowsandbedsheets.com and its partners may earn a commission if you purchase a product through one of our links
Welcome to our easy DIY pillowcase covers tutorial! Whether you’re a beginner or an experienced sewist, this tutorial is perfect for creating beautiful homemade pillowcase covers. With just one yard of fabric and minimal waste, you can quickly make custom pillowcases that add a personal touch to your bedroom décor. Let’s get started!
Key Takeaways:
- Create stunning pillowcase covers with this easy DIY tutorial.
- Use one yard of fabric and minimal waste to make custom pillowcases.
- Add a personal touch to your bedroom décor.
- Perfect for beginners or experienced sewists.
- Transform your bedroom into a cozy and stylish retreat.
Materials and Cutting Instructions
To make your own DIY pillowcase covers, you’ll need a few essential materials. Here’s a list of what you’ll need:
- 1 yard of fabric: Choose a fabric that matches your personal style and complements your bedroom decor.
- Matching thread: Ensure that your thread color matches the fabric to create a seamless look.
- Cutting tools: You’ll need scissors, a rotary cutter, an acrylic ruler, and a cutting mat to precisely cut your fabric.
- Sewing machine: A sewing machine will make the process faster and more efficient.
- Sewing pins: Pins will help hold your fabric in place while sewing.
- Ironing board: An ironing board will be useful for pressing seams and creating crisp edges.
Once you have gathered all the necessary materials, it’s time to follow the cutting instructions to prepare the fabric for your pillowcase.
“Gather your materials before starting the DIY pillowcase cover project.”
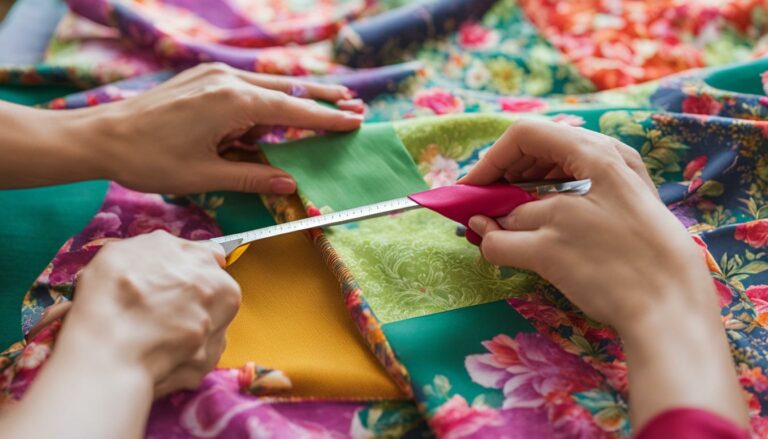
Cutting Instructions
To create the necessary pieces for your pillowcase, follow these simple cutting instructions:
- Step 1: Lay your fabric flat on the cutting mat and use the rotary cutter and ruler to cut a piece measuring 42 inches in width and the full yard length (typically 36 inches).
- Step 2: Trim away any excess threads or uneven edges to ensure a clean finish.
With your fabric now cut to size, you’re ready to move on to the next step of sewing your DIY pillowcase cover. Get ready to bring your creative vision to life!
Tips for Choosing Fabric
When it comes to selecting the perfect fabric for your homemade pillowcase covers, there are a few factors to consider. The fabric you choose will determine the durability, comfort, and overall aesthetic of your pillowcase. Here are some tips to help you make the right choice:
1. Quilting Cotton Fabric: Quilting cotton is a popular choice for pillowcase covers due to its durability and softness. It comes in a wide range of colors, prints, and patterns, allowing you to find the perfect design to match your bedroom decor.
2. Knit Fabric: If you prefer a more stretchy and cozy pillowcase, knit fabric is a great option. It provides a soft and comfortable feel, perfect for a good night’s sleep.
3. Flannel: For colder seasons or those who enjoy a warmer touch, flannel is an excellent choice. Its brushed surface creates a soft and cozy feel, perfect for snuggling up on chilly nights.
4. Sateen or Satin: If you’re looking to add a touch of luxury to your pillowcase covers, consider using sateen or satin fabric. These materials have a smooth and lustrous surface, giving your pillowcase an elegant and sophisticated look.
Coordinating Fabrics
Get creative with your homemade pillowcase covers by using coordinating yards of fabric. Mix and match different patterns, colors, or textures to create a unique and personalized set of pillowcases. By combining complementary fabrics, you can add visual interest and enhance the overall style of your bedroom.
If you have leftover fabric from a quilt or other sewing projects, this is the perfect opportunity to put it to good use. Creating a matching pillowcase with your leftover fabric will not only tie your bedroom decor together but also help reduce fabric waste.

“The fabric you choose will determine the durability, comfort, and overall aesthetic of your pillowcase.”
By carefully selecting the fabric for your pillowcase covers, you can create an inviting and comfortable space in your bedroom. Whether you prefer the durability of quilting cotton, the coziness of flannel, or the elegance of satin, there are endless options to suit your personal style. Don’t be afraid to get creative and experiment with coordinating fabrics to make your pillowcases truly one-of-a-kind.
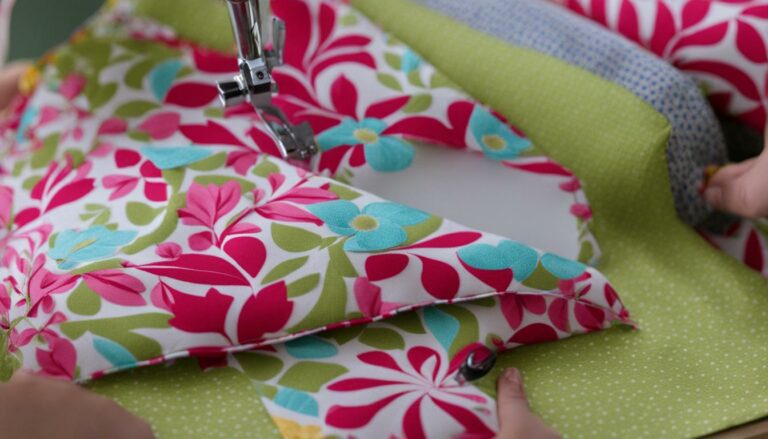
Sewing the Pillowcase
Now that you have your fabric ready, it’s time to sew your DIY pillowcase cover. Follow these step-by-step instructions to create a beautiful and customized pillowcase that will add a personal touch to your bedroom decor.
- Fold the fabric: Start by folding the fabric right sides together to create a rectangle. Make sure the edges are aligned.
- Pin the edges: Use sewing pins to secure the top long edge and one of the side edges. This will keep the fabric in place while you sew.
- Sew the pillowcase: With a 3/8-inch seam allowance, start sewing at the long edge near the opening of the pillowcase and sew all the way around. This will ensure that the pillow inside the case stays secure.
- Trim the corners: After sewing, trim away any extra fabric at the corners to reduce bulk. This will help the pillowcase lay flat and look neat.
- Create the faux trim: Fold the top edge down and press all the way around to create a faux trim. This adds a decorative element to your pillowcase.
- Sew the trim: Secure the trim in place by sewing 3/8 inch from the top folded edge. This will prevent the trim from unfolding during use.
- Flip and press: Turn the pillowcase right side out and press it flat with an iron. This will give your pillowcase a polished look.

Remember, the beauty of DIY pillowcase covers is that you can customize them to suit your style and preferences. Experiment with different fabrics, trims, and embellishments to create unique designs that reflect your personality.
With these simple steps, you can easily sew your own pillowcase cover. The possibilities are endless, allowing you to create beautiful designs that are both functional and stylish.
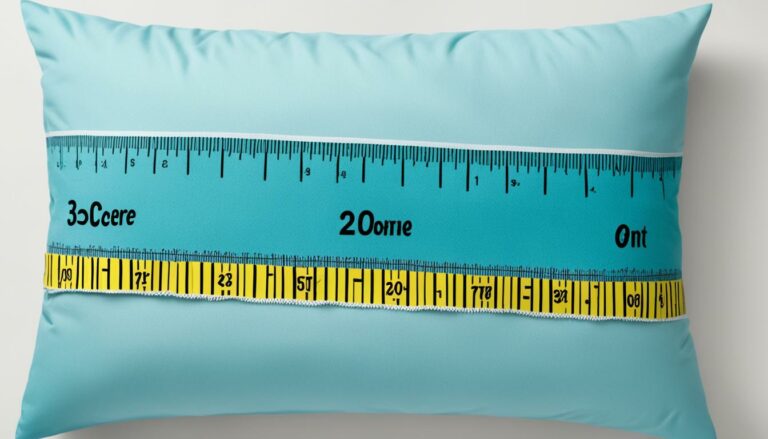
Pillowcase Dimensions
When creating custom pillowcase covers, it’s important to consider the dimensions to ensure a perfect fit for your pillows. This pillowcase tutorial creates standard size pillowcases that measure 20″ x 30″. These dimensions are suitable for standard size pillows and can also accommodate some queen size pillows.
If you prefer a different size for your pillowcases, don’t worry! You can easily adjust the measurements accordingly to create personalized pillowcase covers that meet your exact needs. Whether you want custom pillowcase covers for decorative purposes or for a specific type of pillow, making the necessary size modifications is simple and straightforward.
Personalized Pillowcase Sizes
If the standard size of 20″ x 30″ doesn’t meet your requirements, you can adjust the measurements based on the size of your pillows. Here are some common pillow sizes and the corresponding pillowcase dimensions:
| Pillow Size | Pillowcase Dimensions |
|---|---|
| Standard | 20″ x 26″ |
| Queen | 20″ x 30″ |
| King | 20″ x 36″ |
By adjusting the measurements according to your specific pillow size, you can ensure a tailored and snug fit for your custom pillowcase covers.

With the pillowcase dimensions in mind, you’re now ready to create personalized and custom-fit pillowcase covers for your pillows. Whether you’re looking to add decorative elements or showcase your unique style, having the right dimensions is key to achieving the perfect look and fit.
French Seam Pillowcase
If you want to create a pillowcase with no exposed seams, you can use the French seam method. This involves sewing the pillowcase with the wrong sides together first, trimming the seam allowance, and then sewing again with the right sides together to encase the raw edges. This creates a neat and finished look for your pillowcase.

“The French seam method is a fantastic technique for achieving a professional and polished appearance in your pillowcase covers. The finished result is not only visually appealing but also ensures that the seams are securely enclosed, preventing any fraying.”
To create a pillowcase using the French seam method, follow these simple steps:
- Step 1: Place the fabric pieces together, wrong sides facing each other. Pin along the edges to secure them in place before sewing.
- Step 2: Stitch a 1/4-inch seam along the pinned edges. This will be the first seam.
- Step 3: Trim the seam allowance down to 1/8 inch, ensuring to not cut the stitches. This step helps to reduce bulk and excess fabric.
- Step 4: Press the seam open to one side, making sure to use an iron at a suitable temperature for your fabric.
- Step 5: Fold the fabric along the seam, right sides facing each other. Pin the edges together to secure them prior to sewing.
- Step 6: Sew a 3/8-inch seam along the pinned edges, enclosing the raw edges of the previous seam. This will be the second seam.
- Step 7: Trim the second seam allowance down to 1/8 inch, again taking care not to cut the stitches.
- Step 8: Press the second seam open to create a beautifully finished French seam.
- Step 9: Turn the pillowcase right side out and press it flat one final time for a crisp and professional-looking finish.
By using the French seam method, you can elevate your DIY pillowcase covers to a new level of craftsmanship. This technique is particularly well-suited for decorative pillowcase covers, as it ensures that every edge is smooth, clean, and visually appealing.
French Seam Pillowcase: Benefits
The French seam method offers several benefits when creating pillowcase covers:
- Neat and Professional: The French seam creates a clean and polished appearance, adding sophistication to your homemade pillowcase covers.
- Durable and Long-lasting: The enclosed seams provide additional strength and reduce the chances of fraying or unraveling over time.
- No Exposed Seams: With the raw edges fully encased within the French seam, you won’t have any unsightly or scratchy seams on the inside of your pillowcase.
- Enhanced Comfort: The absence of exposed seams ensures a smooth and comfortable surface against your skin while sleeping.
Whether you’re making decorative pillowcase covers for your own bedroom or creating personalized gifts for friends and family, the French seam method is a valuable technique to add to your sewing repertoire. It guarantees a professional finish and ensures that your pillowcases look as good on the inside as they do on the outside.
Envelope Pillowcase Closure
Add a classic and convenient touch to your DIY pillowcase covers with the envelope closure. This closure style involves sewing an overlapping section on the back of the pillowcase, allowing you to easily insert and remove the pillow whenever needed. Not only does the envelope closure provide practicality, but it also adds an elegant and decorative element to your personalized pillowcase covers.
With the envelope closure, you can ensure that your pillow stays securely inside the case, preventing it from slipping out during the night. This closure style is perfect for both custom and personalized pillowcase covers, as it allows you to easily switch out pillows without compromising the overall aesthetics of your bedroom decor.
Here’s how you can achieve the envelope closure for your DIY pillowcase covers:
- Sew the front and back pieces of the pillowcase together, right sides facing each other, and leaving the top edge open.
- Fold and press the back piece of fabric by approximately 4-6 inches, creating an overlapping section.
- Pin the overlapping section in place to secure it.
- Stitch along the edges of the pillowcase, ensuring that the overlapped section is securely sewn.
- Trim any excess fabric and threads.
By following these simple steps, you can easily incorporate the envelope closure into your DIY pillowcase covers, giving them a professional finish and practical functionality. This closure style is versatile and works well with various fabric choices, allowing you to create custom pillowcase covers that perfectly match your unique style and preferences.
Benefits of the Envelope Closure
The envelope closure offers several advantages over other closure methods. Here are a few key benefits:
- Convenience: The overlapping design allows you to effortlessly insert and remove your pillow whenever needed.
- Secure Fit: The envelope closure ensures that your pillow remains securely inside the case, preventing it from slipping out during the night.
- Decorative Touch: The overlapped fabric adds an elegant and decorative element to your custom and personalized pillowcase covers.
- Easy Maintenance: With the envelope closure, you can easily remove the pillowcase for washing and cleaning, keeping your bedding fresh and hygienic.
Enhance the functionality and style of your DIY pillowcase covers with the timeless envelope closure. Whether you’re making custom pillowcase covers for yourself or personalized pillowcase covers as gifts, this closure method offers a practical and elegant solution that will elevate your bedroom decor. Try it out today and enjoy the convenience and beauty of envelope closure pillowcase covers.
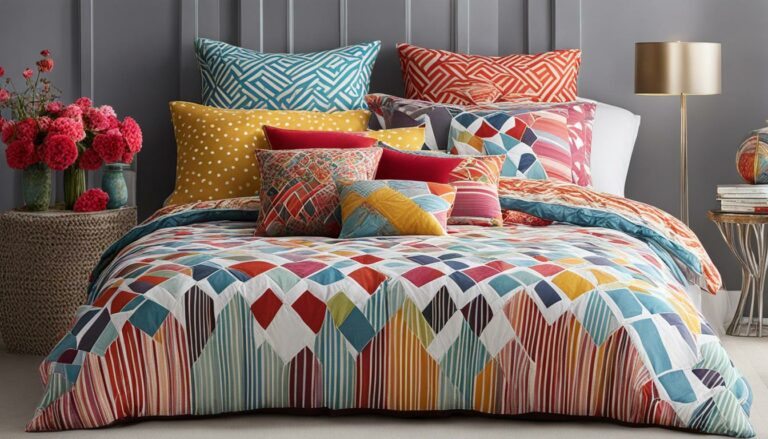
Choosing Multiple Fabrics
One of the fun aspects of making your own pillowcase is the opportunity to use multiple fabrics. You can mix and match different prints and colors to create a unique and personalized design. This is a great way to showcase your creativity and add a personal touch to your bedroom decor.
When selecting fabrics for your DIY pillowcase covers, consider a combination of complementary colors or patterns that coordinate with your existing bedding or home decor. You can choose fabrics with floral, geometric, or abstract designs to create visually appealing pillowcases that make a statement in your bedroom.
Experiment with Different Fabrics
Don’t limit yourself to just quilting cotton. Explore a variety of fabrics to create interesting textures and visual interest. Some fabric options you can consider include:
- Flannel: Perfect for cozy and warm pillowcases, especially during the colder months.
- Linen: Provides a natural and relaxed look, perfect for a rustic or farmhouse-style bedroom.
- Satin or silk: Adds a touch of luxury and elegance to your pillowcase covers.
- Velvet: Creates a plush and velvety texture, ideal for adding a luxurious touch to your bedroom decor.
- Knit: Offers a stretchy and comfortable option, perfect for pillowcases that need to stretch to accommodate larger or plump pillows.
Remember to consider the comfort and use of the pillowcase when selecting different fabrics. For example, if you prefer a smooth and cool feel against your skin, satin or silk pillowcases may be a great choice for you. On the other hand, if you enjoy a cozy and warm sensation, flannel or velvet fabrics will suit your preferences.
Combining Fabrics for Visual Interest
When mixing and matching fabrics, you can choose to use different patterns within the same color scheme or experiment with contrasting colors and designs. For example, you could pair a floral print fabric with a solid color fabric for a subtle and visually pleasing combination. Alternatively, you could combine two contrasting prints, such as stripes and polka dots, for a bolder and more whimsical look.
I love experimenting with different fabrics when creating pillowcase covers. It’s amazing how a simple mix of different patterns and textures can instantly transform the look of my bedroom. Plus, it’s a fantastic way to let my personal style shine through.
Consider the overall color palette and theme of your bedroom when choosing fabrics. If your bedroom has a specific color scheme, select fabrics that complement the existing decor to create a cohesive and harmonious look.
Remember, the key is to have fun and let your creativity run wild when choosing multiple fabrics for your DIY pillowcase covers. Don’t be afraid to mix patterns, experiment with different textures, and create unique combinations that reflect your personal style and taste.
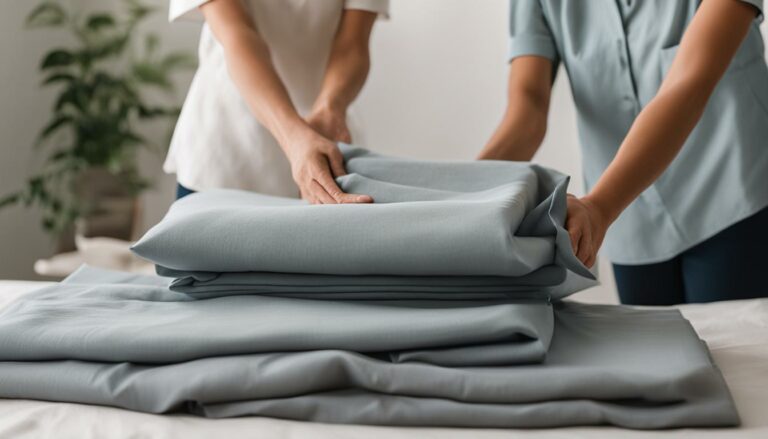
Charity Sewing with Pillowcase Covers
Sewing pillowcase covers is not only a fun and creative activity, but it can also serve as a meaningful contribution to charity sewing. Numerous organizations, including foster care organizations and hospitals, greatly appreciate donations of homemade pillowcases for individuals in need. By using this tutorial to make your own beautiful and functional pillowcases, you can make a positive impact in the lives of others.
When participating in charity sewing with pillowcase covers, you have the opportunity to provide comfort and joy to those who may be going through challenging times. Your handmade creations can add a personal touch to someone’s living space, offering them a sense of warmth and security.
Not only are you helping others by donating homemade pillowcases, but you are also fostering your own creativity and improving your sewing skills in the process. The satisfaction of creating something beautiful with your own hands and knowing that it will bring comfort to someone in need is truly rewarding.
To get started with charity sewing, reach out to local organizations that accept pillowcase donations or check online platforms dedicated to connecting sewists and charities. They can provide you with specific guidelines and instructions on how to donate your pillowcases. Make sure to follow any requirements they may have regarding fabric choices, sizes, or finishes to ensure that your donated pillowcases can be utilized effectively.
“Sewing pillowcase covers for charity allows you to make a difference in someone’s life while pursuing your passion for sewing. The simple act of creating a beautiful and cozy pillowcase can bring comfort and joy to those in need, making it a truly rewarding experience.” – Kelly Smith, Sewing Enthusiast
If you would like to make an even greater impact, consider organizing a pillowcase drive within your community. Encourage your friends, family, coworkers, and fellow sewing enthusiasts to join you in creating homemade pillowcases for a chosen charity. This collective effort can produce a significant number of pillowcases, amplifying the positive impact you can make together.
Remember, every pillowcase you sew and donate has the potential to bring comfort, love, and a touch of home to someone facing challenging circumstances. Whether it’s providing a child in foster care with a cozy and personalized pillowcase or offering a patient in a hospital a small piece of comfort, your contribution matters.
Benefits of Charity Sewing with Pillowcase Covers
The act of sewing pillowcase covers for charity goes beyond the creation of a simple home decor item. Here are some of the benefits you can experience:
- Personal fulfillment: Knowing that your sewing skills and creativity are making a positive impact in someone’s life can bring a sense of fulfillment and purpose.
- Connecting with others: By joining a charity sewing initiative, you can connect with like-minded individuals who share your passion for sewing and giving back to the community.
- Honing your skills: Charity sewing projects allow you to improve your sewing techniques and try new patterns or fabric combinations, enhancing your sewing abilities.
- Spreading kindness: The simple act of making and donating pillowcase covers exudes kindness, compassion, and generosity, creating a ripple effect that can inspire others to contribute in their own ways.
Embark on your charity sewing journey today and use your sewing skills to create beautiful and functional pillowcase covers for those in need.
Additional Pillowcase Projects
Once you’ve mastered the art of making basic pillowcase covers, you can explore additional projects to take your skills to the next level. From ruffled pillowcases to festive plump tufted pillows, there are endless possibilities for creating unique and beautiful designs that will add a personalized touch to your decor.
1. Ruffled Pillowcases
Elevate your pillow game with ruffled pillowcases. These charming additions will bring a touch of elegance and whimsy to your bedroom. Choose a coordinating fabric that complements your bedding, and follow a simple ruffle tutorial to create a beautiful decorative trim for your pillowcases.
2. Plump Tufted Pillows for the Holidays
Add a festive touch to your home during the holidays with plump tufted pillows. These cozy and decorative pillows will instantly transform your space into a winter wonderland. Choose seasonal fabrics in rich colors or playful patterns, and use a tufting technique to create an eye-catching textured effect.
Don’t be afraid to experiment with different fabrics, trims, and embellishments to create pillowcases that reflect your personal style and match the theme of your room. The only limit is your imagination!
3. Monogrammed Pillowcases
Add a personal touch to your pillowcases by monogramming them. Whether you choose your initials, a special symbol, or a meaningful word, monogrammed pillowcases make a stylish statement. You can use embroidery, fabric paint, or iron-on letters to create your monogram, depending on your preferred technique.
| Pillowcase Project | Description |
|---|---|
| Ruffled Pillowcases | Add a touch of elegance and whimsy with ruffled trims. |
| Plump Tufted Pillows for the Holidays | Create cozy and festive pillows with a tufting technique. |
| Monogrammed Pillowcases | Add a personalized touch with custom monograms. |
These pillowcase projects are perfect for unleashing your creativity and making your bedroom uniquely yours. Experiment with different techniques, fabrics, and embellishments to create pillowcases that reflect your personal style and match the theme of your room. Whether you’re decorating for a special occasion or simply want to update your bedroom decor, these projects offer endless possibilities for creating custom, decorative pillowcase covers.
Share Your Pillowcase Creations
Get ready to share your beautiful pillowcase creations with the sewing community! Show off your handmade masterpieces and inspire others with your creativity and sewing skills. By sharing your pillowcase photos on social media, you can connect with fellow sewists and join a supportive community of DIY enthusiasts.
Use the hashtag #diypillowcasecovers to make your creations easily discoverable by others. By including this popular hashtag, you can ensure that your pillowcases are seen by a wider audience of fellow crafters and pillow lovers.
Don’t forget to tag the tutorial creator or sewing influencers who have inspired you along the way. By tagging them, you can give credit where it’s due and show appreciation for their guidance and expertise. It’s a great way to connect with your favorite creators and get feedback on your projects.
Share your pillowcase creations with the world and inspire others to dive into the wonderful world of homemade pillowcase covers. Your unique designs and impeccable craftsmanship can serve as a catalyst for someone else’s creative journey. So go ahead, share your beautiful creations and be a part of the vibrant sewing community!
Share Your Pillowcase Creations Checklist:
- Sew your favorite pillowcase design using the tutorial.
- Take clear and well-lit photos of your pillowcases.
- Post your photos on social media platforms like Instagram, Facebook, or Pinterest.
- Include the hashtag #diypillowcasecovers in your captions or comments.
- Tag the tutorial creator or sewing influencers who have inspired you.
- Engage with the sewing community by liking and commenting on other people’s pillowcase photos.
There’s nothing more fulfilling than seeing your pillowcase creations being appreciated by others. So don’t hesitate, share your talent, and let your DIY pillowcase covers shine!
Conclusion
Making your own pillowcase covers is a rewarding and enjoyable sewing project that allows you to unleash your creativity and add a personal touch to your bedroom decor. With this easy tutorial, you can create beautiful, custom pillowcases with minimal fabric waste and no exposed seams. Whether you’re a beginner or an experienced sewist, this project is perfect for everyone.
By following the step-by-step instructions, you’ll be able to make DIY pillowcase covers that match your style and taste. The tutorial provides clear cutting and sewing instructions, ensuring that even beginners can create professional-looking pillowcases.
Start your DIY pillowcase covers today and transform your bedroom into a cozy and stylish retreat. Add a pop of color or a fun pattern to your pillows to make them truly unique. With your homemade pillowcase covers, you’ll have a bedroom that reflects your personality and showcases your sewing skills. Get creative and enjoy the process of making beautiful pillowcases that you’ll be proud to display on your bed.
FAQ
What materials do I need to make a pillowcase cover?
You will need 1 yard of fabric, matching thread, cutting tools (scissors, rotary cutter, acrylic ruler, cutting mat), a sewing machine, sewing pins, and an ironing board.
What fabric is recommended for making pillowcase covers?
Regular quilting cotton fabric is a popular choice for its durability and softness. Knit fabric, flannel, sateen, and satin can also be used. You can even use coordinating fabrics to create personalized designs.
How do I sew a pillowcase cover?
To sew a pillowcase cover, first fold the fabric right sides together to create a rectangle. Pin along the top long edge and one of the side edges. Sew with a 3/8 inch seam allowance, starting at the long edge near the opening of the pillowcase and sewing all the way around. Trim away any extra fabric at the corner, fold the top edge down, and press to create faux trim. Sew 3/8 inch from the top folded edge to secure the trim. Finally, turn the pillowcase right side out and press it flat.
What are the dimensions of the pillowcase covers?
The standard size pillowcases created using this tutorial measure 20″ x 30″. They will fit standard size pillows and some queen size pillows.
Can I make a pillowcase cover with no exposed seams?
Yes, you can use the French seam method. This involves sewing the pillowcase with the wrong sides together first, trimming the seam allowance, and then sewing again with the right sides together to encase the raw edges.
What is an envelope closure for a pillowcase?
An envelope closure is a convenient way to close a pillowcase. It involves sewing an overlapping section on the back of the pillowcase so that you can easily insert and remove the pillow. This closure ensures that the pillow stays securely inside the case while adding a decorative touch.
Can I use multiple fabrics to make a pillowcase cover?
Absolutely! Mixing and matching different prints and colors allows you to create a unique and personalized design for your pillowcase cover.
How can I contribute to charity sewing with pillowcase covers?
Many organizations, such as foster care organizations or hospitals, accept donations of pillowcases for those in need. By using this tutorial, you can create beautiful and functional pillowcases to make a meaningful impact in the lives of others.
What are some additional pillowcase projects I can try?
Once you’ve mastered the basic pillowcase cover, you can explore other projects such as making ruffled pillowcases or creating festive plump tufted pillows for the holidays.
How can I share my pillowcase creations?
Share your pillowcase creations with the sewing community by posting pictures on social media. Use the hashtag #diypillowcasecovers or tag the tutorial creator to showcase your beautiful handmade pillowcases.
Why should I make my own pillowcase covers?
Making your own pillowcase covers allows you to unleash your creativity and add a personal touch to your bedroom decor. With this easy tutorial, you can create beautiful, custom pillowcases with minimal fabric waste and no exposed seams.
Eric Christie stands as a luminary in the bedding industry, with a career spanning nearly four decades since the early 1980s. His journey through the world of bedding has seen him wear many hats – a manufacturer, designer, and retailer, showcasing his versatility and expertise in Read more...