Craft Unique Homemade Pillowcases Easily!

Eric Christie
Owner - Pillows and BedsheetsEric Christie stands as a luminary in the bedding industry, with a career spanning nearly four decades since the early 1980s. His journey through the world of bedding has seen him wear many hats – a manufacturer, designer, and retailer, showcasing his versatility and expertise in Read more...
pillowsandbedsheets.com and its partners may earn a commission if you purchase a product through one of our links
Creating your own homemade pillowcases can be a fun and easy DIY project. With just a few materials and some creativity, you can make personalized pillowcases that add a unique touch to your bedroom décor. In this article, we will explore different techniques and ideas for making homemade pillowcases.
Key Takeaways:
- Homemade pillowcases are a great way to personalize your bedroom décor.
- DIY pillowcase ideas allow you to express your creativity and style.
- Easy pillowcase sewing techniques make it accessible for beginners.
- Personalized pillowcases can be a thoughtful and unique gift.
- Experiment with different techniques, patterns, and colors to create one-of-a-kind pillowcases.
DIY Watercolor Sharpie Pillowcases
Looking for a simple yet beautiful craft project that your kids will love? Try creating watercolor sharpie pillowcases using permanent markers! This easy DIY technique allows you to transform plain pillowcases into stunning works of art that can be cherished for years to come.
To get started, gather the following materials:
- Plain white pillowcases
- Sharpie markers in various colors
- Rubbing alcohol
- Eye dropper or spray bottle
Once you have your materials ready, follow these simple steps:
- Place a piece of cardboard or plastic inside the pillowcase to prevent the colors from bleeding through to the other side.
- Using your Sharpie markers, draw designs, patterns, or doodles directly onto the pillowcase. You can experiment with different shapes and color combinations to create a unique watercolor effect.
- Once you are satisfied with your design, fill an eye dropper or spray bottle with rubbing alcohol.
- Hold the dropper or bottle close to the pillowcase and gently squeeze or spray the rubbing alcohol onto the areas where you want the colors to blend.
- Watch as the alcohol interacts with the markers, causing the colors to spread and create a beautiful watercolor effect.
- Allow the pillowcase to dry completely before using or displaying.
Tip: You can experiment with different techniques to achieve different effects. Try spraying the rubbing alcohol from a distance for a more subtle blending or use a dropper for more precise control over the colors.
Your DIY watercolor sharpie pillowcases are now ready to add a touch of creativity to your bedroom décor! Not only are these pillowcases fun to make, but they also make great gifts for friends and family.
Why Watercolor Sharpie Pillowcases are Perfect for Kids
Watercolor sharpie pillowcases are an ideal craft project for kids for several reasons:
“Creating watercolor sharpie pillowcases allows children to explore their artistic side and express their creativity. It’s a fun and engaging activity that can be enjoyed by children of all ages. They can experiment with different colors, patterns, and blending techniques, resulting in unique and personalized pillowcases that showcase their individuality.”
– Amy Roberts, Art Teacher
With this easy pillowcase craft for kids, you can encourage their imagination, boost their self-confidence, and foster their appreciation for handmade creations. Let them design their own pillowcases and watch their faces light up with pride when they see their beautiful artwork come to life!
Personalized Pillowcases with Tulip Fabric Markers
Give your pillowcases a personal touch by using Tulip Fabric Markers to create unique and customized designs. This is a fun and engaging activity, perfect for a sleepover party or as a creative project for kids. With Tulip Fabric Markers in hand, your little ones can unleash their creativity and make their very own personalized pillowcases.
Using Tulip Fabric Markers is simple and hassle-free. Just draw and color directly on the pillowcase to create vibrant designs that express your child’s individuality. These fabric markers are specially formulated for use on fabric, ensuring long-lasting and fade-resistant designs. Whether your child wants to write their name, draw their favorite characters, or create intricate patterns, Tulip Fabric Markers provide the tools to bring their imagination to life.
With Tulip Fabric Markers, the possibilities are endless. Encourage your child to experiment with different colors, shading techniques, and patterns to create a truly personalized masterpiece. The best part is that these markers are permanent and can withstand regular washing, ensuring that your child’s creations stay bright and vibrant for a long time.
Not only are personalized pillowcases with Tulip Fabric Markers a great way to enhance your child’s creativity, but they also make wonderful gifts and keepsakes. Imagine the joy of receiving a pillowcase adorned with a heartfelt message or a custom-designed artwork. It’s a gift that is sure to bring smiles and warm memories for years to come.
So go ahead, gather your Tulip Fabric Markers and let the creativity flow. Organize a sleepover party and provide a fun and engaging activity for your child and their friends. Watch as their imagination takes flight and their pillowcases transform into beautiful works of art. With Tulip Fabric Markers, personalized pillowcases become more than just a decorative item – they become cherished symbols of creativity, self-expression, and sweet dreams.
Benefits of Personalized Pillowcases with Tulip Fabric Markers:
- Allows children to express their creativity and individuality
- Makes for a fun and engaging sleepover activity
- Creates unique and customized designs
- Tulip Fabric Markers are specially formulated for fabric
- Designs are long-lasting and fade-resistant even after regular washing
- Makes a thoughtful and personalized gift
“Doodle, draw, and design – with Tulip Fabric Markers, the possibilities for personalized pillowcases are endless!”
Designing Pillowcases with DecoArt Ink Effects
When it comes to creating personalized designs on pillowcases, DecoArt Ink Effects fabric paint offers an exciting and unique method. With a wide range of vibrant colors to choose from, this craft activity allows kids to unleash their creativity and make pillowcases that are truly one-of-a-kind.
Here’s how it works: first, kids can paint their designs on regular white paper using DecoArt Ink Effects fabric paint. This provides them with a blank canvas to experiment with different patterns, colors, and styles. Once the designs are complete, the next step is to transfer them onto the actual pillowcase.
To transfer the designs, simply place the painted paper face-down on the pillowcase, making sure the design is positioned exactly where you want it to appear. Then, using a hot iron set on a low-mid heat setting, iron over the paper for about 30-60 seconds. This heat transfer process will bond the fabric paint to the pillowcase, creating a permanent and durable design.
Not only is designing pillowcases with DecoArt Ink Effects fabric paint a fun and engaging craft idea, but it’s also a perfect activity for sleepovers or creative get-togethers. Kids can create their own personalized pillowcases, showcasing their artistic skills and expressing their unique personalities.
Let your child’s imagination run wild with this sleepover craft idea. They can experiment with different color combinations, try out various painting techniques, and even incorporate stencils or stamps to add extra flair to their designs.
With DecoArt Ink Effects fabric paint, your child can transform plain white pillowcases into colorful masterpieces that reflect their individual style. It’s a fantastic way to encourage creativity and provide a fun outlet for self-expression. Your child will love going to sleep each night on a pillowcase they designed themselves.
With DecoArt Ink Effects fabric paint, your child can create pillowcases that are as unique as they are. The vibrant colors and durable designs will make their creations stand out and bring a touch of personalization to their bedroom décor.
Materials Needed for Homemade Pillowcases
To create your own homemade pillowcases, you will need a few basic materials. Here’s a list of what you’ll need:
- Fabric markers
- Rubbing alcohol
- Sharpies
- DecoArt Ink Effects fabric paint
- White pillowcases
- Spray bottles
- Hot iron
These materials will help you unleash your creativity and make unique pillowcases that reflect your personal style. Let’s take a closer look at each one.
Fabric Markers
Fabric markers, such as Tulip Fabric Markers, are perfect for creating bright and vibrant designs on your pillowcases. These markers are specifically designed for fabric, ensuring that your designs stay vibrant even after washing.
Rubbing Alcohol
For the watercolor sharpie technique, you’ll need rubbing alcohol. This will help you create a beautiful watercolor effect by blending the colors of the Sharpies together.
Sharpies
Sharpies are versatile and easy-to-use permanent markers that can be used to draw intricate designs on your pillowcases. With a wide range of colors available, you can let your imagination run wild and create stunning designs.
DecoArt Ink Effects Fabric Paint
If you want to try a different technique, DecoArt Ink Effects fabric paint is a great option. This paint allows you to create personalized designs on paper, which can then be transferred onto your pillowcases using an iron. It offers a unique and artistic way to customize your pillowcases.
White Pillowcases
White pillowcases serve as the perfect canvas for your creativity. They provide a blank slate for you to design and bring your ideas to life.
Spray Bottles
When using the watercolor sharpie technique, spray bottles are essential for applying rubbing alcohol onto the designs. These bottles help you control the distribution of alcohol and achieve the desired effect.
Hot Iron
A hot iron is necessary for setting the designs on your pillowcases. This ensures that your creations remain vibrant and intact even after washing.
Now that you have all the materials ready, let’s move on to the step-by-step instructions for creating your homemade pillowcases.

Step-by-Step Instructions for Homemade Pillowcases
Creating your own homemade pillowcases is a rewarding craft that allows you to add a personal touch to your bedroom decor. Whether you’re a beginner or an experienced crafter, these step-by-step instructions will guide you through the process of making beautiful pillowcases. Whether you choose the watercolor sharpie technique, fabric markers, or fabric paint, the general steps remain the same.
Step 1: Gather Your Materials
Before you begin, make sure you have all the necessary materials within reach. These include:
- Pillowcase(s)
- Fabric markers or Sharpies
- Rubbing alcohol (for watercolor sharpie technique)
- DecoArt Ink Effects fabric paint (if desired)
- Spray bottles
- A hot iron
Step 2: Prepare the Pillowcase
Before you start painting or coloring, it’s a good idea to wash and iron the pillowcase to ensure a smooth surface for your design.
Step 3: Design Your Pillowcase
Now comes the fun part—let your creativity flow! Choose your preferred technique:
Watercolor Sharpie Technique: Use fabric markers or Sharpies to color your pillowcase, creating your desired design. To create a watercolor effect, spray rubbing alcohol over the colored areas and watch the colors blend together beautifully.
Fabric Marker Technique: Draw and color directly on the pillowcase using fabric markers. Let your imagination run wild and create your own personalized design.
Fabric Paint Technique: Using DecoArt Ink Effects fabric paint, paint your design on white paper. Once dry, carefully place the painted side onto the pillowcase and press an iron on top to transfer the design.
Step 4: Set the Design
Once you’ve completed your design, it’s important to set it to ensure it lasts. The method for setting the design depends on the technique used:
Watercolor Sharpie Technique: To set the watercolor effect, place a clean cloth over the pillowcase and use a hot iron to gently heat the design. Alternatively, you can wash the pillowcase on a gentle cycle and tumble dry low.
Fabric Marker Technique: Allow the design to air dry for at least 24 hours. Once dry, heat-set the design by placing a cloth over the pillowcase and pressing a hot iron on top for approximately 30 seconds.
Fabric Paint Technique: Follow the instructions provided with the DecoArt Ink Effects fabric paint to set the design. This may involve heating the design with an iron or washing the pillowcase.
Congratulations! You’ve successfully created a homemade pillowcase that is uniquely yours. Now, let’s take a look at a step-by-step summary of the process:
| Step | Instructions |
|---|---|
| Step 1 | Gather your materials |
| Step 2 | Prepare the pillowcase |
| Step 3 | Design your pillowcase |
| Step 4 | Set the design |
Now that you know the step-by-step process, it’s time to unleash your creativity and make stunning homemade pillowcases. Happy crafting!
Tips and Tricks for Homemade Pillowcases
When making homemade pillowcases, there are a few tips and tricks that can help you achieve the best results. Whether you’re using the watercolor Sharpie technique or fabric markers, these tips will assist you in creating personalized designs that reflect your unique style.
1. Experiment with Color Intensity
In the watercolor Sharpie technique, applying heavier and more saturated colors will create a better watercolor effect. By varying the pressure and layering the colors, you can achieve stunning gradients and depth in your designs. Play around with different color combinations and intensities to find the perfect balance.
2. Create Cohesive Designs
For the fabric marker technique, consider making larger drawings to cover the entire pillowcase. Fill in the white space with smaller doodles or patterns to create a more cohesive design. This will ensure that your personalized pillowcases stand out and make a statement.
3. Use Stencils and Templates
If you’re not confident in your drawing skills, don’t worry! You can use stencils or templates to guide your designs. There are plenty of free printable options available online, or you can create your own. Stencils and templates can help you achieve precise and professional-looking designs.
4. Incorporate Different Textures
Don’t limit your designs to just drawings and patterns. Consider adding fabric appliques, embroidery, or even fabric paint to create different textures on your pillowcases. This will add visual interest and make your designs truly unique.
5. Pay Attention to Fabric Selection
When choosing fabric for your homemade pillowcases, opt for natural fibers like cotton or linen. These fabrics are breathable, soft, and easy to work with. Pre-wash the fabric before starting your project to eliminate any shrinking or bleeding that may occur during the washing process.
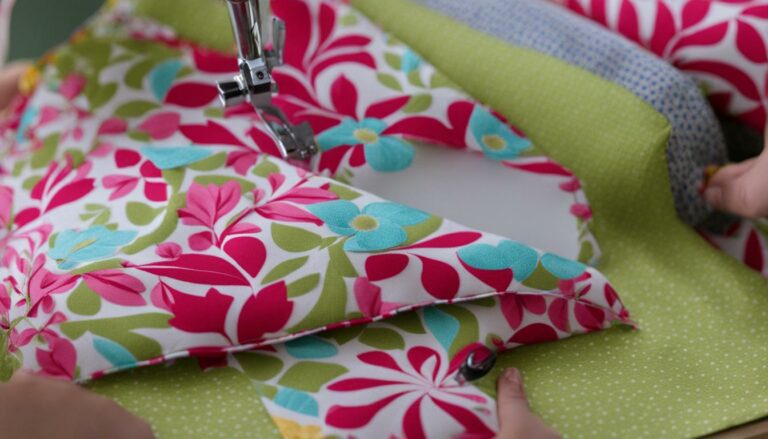
6. Practice Proper Sewing Techniques
If you’re sewing your pillowcases from scratch, make sure to follow proper sewing techniques. This will ensure that your pillowcases are well-constructed and durable. Use quality thread, backstitch at the beginning and end of each seam, and press your seams for a polished finish.
Remember, the key to successful homemade pillowcases is experimentation and creativity. Don’t be afraid to try new techniques and designs. With these tips and tricks, you’ll be able to create personalized pillowcases that add a special touch to your bedroom decor.

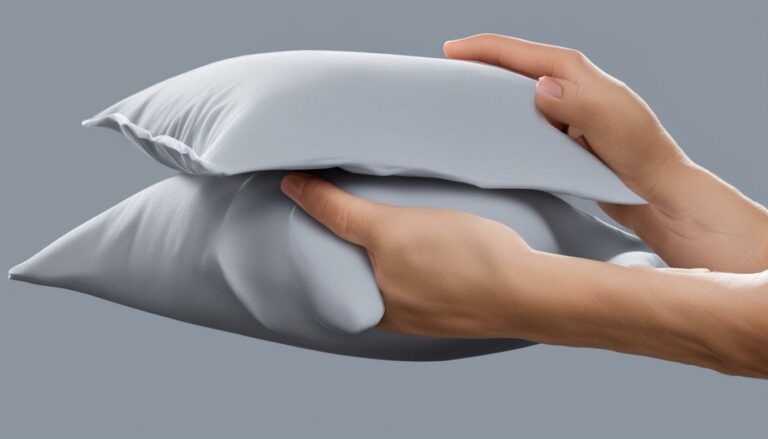
Care and Maintenance of Homemade Pillowcases
Once you’ve made your homemade pillowcases, it’s important to properly care for them to ensure they last. Depending on the technique used, the pillowcases may need to be washed before use to set the design. To keep your homemade pillowcases looking their best, follow these care instructions:
- Wash on a gentle cycle: To protect the design and fabric, it’s best to wash homemade pillowcases on a gentle cycle using mild detergent. This will help prevent any damage to the colors or artwork.
- Tumble dry low: After washing, tumble dry the pillowcases on a low heat setting. Avoid high temperatures, as they might cause the colors to fade or the fabric to shrink.
- Iron if necessary: If your homemade pillowcases require ironing, be sure to do so on a low heat setting. Ironing with excessive heat can damage the design or fabric.
- Follow material-specific instructions: Different materials may require specific care instructions. Always refer to the instructions provided with the fabric markers, paint, or any other materials you used to create your pillowcases.
By following these washing and care instructions, you can ensure that your homemade pillowcases remain vibrant and beautiful for a long time.
“Proper care and maintenance are essential to preserve the beauty and longevity of your homemade pillowcases.”
Expert Tip:
Consider laundering your homemade pillowcases separately from other bedding items to prevent any potential color bleeding or damage to the designs.
| Care Instructions | Recommendations |
|---|---|
| Washing | Gentle cycle with mild detergent |
| Drying | Tumble dry low heat |
| Ironing | Low heat |
| Material-specific instructions | Follow provided guidelines |
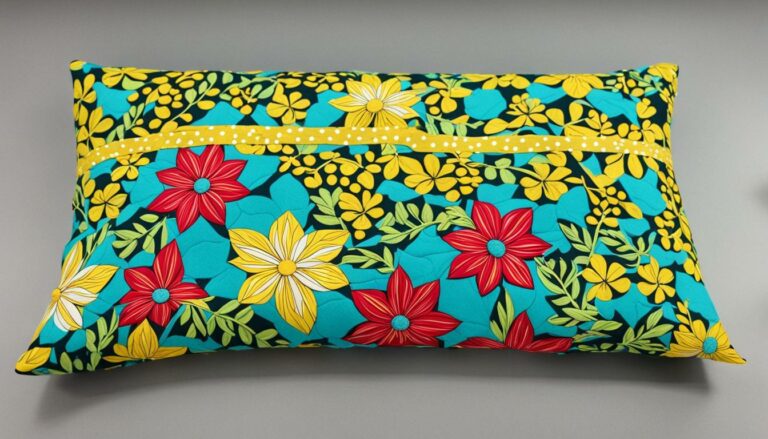
Customization Ideas for Homemade Pillowcases
The beauty of homemade pillowcases is the ability to personalize and customize them. You can experiment with different designs, patterns, and colors to create unique and decorative pillowcases that match your style or the theme of your bedroom. Consider adding names, intricate drawings, or even signatures from friends or family as a special touch.
Custom Pillowcase Ideas
When it comes to custom pillowcase ideas, the options are endless. Here are a few creative suggestions to get you started:
- Create a monogram pillowcase by embroidering your initials onto the fabric.
- Use fabric markers or fabric paint to draw your favorite quotes or phrases on the pillowcase.
- Design a pillowcase with a nature-inspired theme by painting flowers or leaves.
- Add a touch of whimsy by sewing on colorful pom-poms or tassels.
- Experiment with different fabric textures, such as velvet or lace, to create a visually interesting pillowcase.
Decorative Designs
When it comes to decorative designs, let your imagination run wild. Consider incorporating elements like geometric shapes, abstract patterns, or even animal motifs into your pillowcase. The key is to have fun and let your creativity shine through.
“A personalized pillowcase is not just a decorative item; it’s a reflection of your unique style and taste.”
Handmade Pillowcases
Making your own pillowcases allows you to have handmade pieces that are not only visually appealing but also infused with your personal touch. Each stitch, brushstroke, or design choice is a testament to your creativity and adds a special charm to your bedroom décor.
So go ahead, unleash your artistic side, and create one-of-a-kind handmade pillowcases that will make a statement in your bedroom!

Showcasing Your Homemade Pillowcases
Once you’ve made your homemade pillowcases, you’ll want to showcase them in your bedroom. There are many creative ways to display your pillowcases, such as stacking them on your bed, arranging them on a decorative ladder, or even framing them and hanging them on the wall. Let your imagination run wild and find a display method that suits your style.
Display Ideas for Your Homemade Pillowcases
Here are some creative ideas to inspire you in showcasing your homemade pillowcases:
- Stack them on your bed to add a pop of color and texture to your overall bedroom décor.
- Arrange them on a decorative ladder for a rustic and charming display.
- Frame your favorite pillowcases and hang them on the wall as unique artwork.
- Create a cozy reading nook by piling pillowcases on a comfortable chair or sofa.
- Place them in a woven basket or decorative storage box for easy access and an organized look.
Remember, the goal is to showcase your creative homemade pillowcases, so feel free to experiment with different display options and mix and match styles to create a personalized and visually stunning bedroom ambiance.
| Display Method | Description |
|---|---|
| Stacking pillowcases on your bed provides a simple yet effective way to display and enhance your bedroom décor. | |
| Arranging pillowcases on a decorative ladder adds an artistic touch and brings a rustic charm to your space. | |
| Frame your favorite pillowcases and transform them into unique wall art pieces, creating a focal point in your room. | |
 |
Create a cozy reading nook by piling pillowcases on a chair or sofa, making it inviting and comfortable. |
| Place pillowcases in a woven basket or decorative storage box, keeping them organized while adding a touch of elegance to your room. |
Conclusion – Embrace Your Creativity with Homemade Pillowcases
Making homemade pillowcases is a wonderful way to embrace your creativity and add a personal touch to your bedroom décor. DIY home décor projects allow you to unleash your imagination and create something truly unique and beautiful. With homemade pillowcases, you have the freedom to choose from various techniques such as the watercolor sharpie technique, fabric markers, or fabric paint, and experiment with different designs, colors, and patterns. The possibilities are endless!
By crafting your own pillowcases, you can showcase your creativity and express your personality through your home accessories. Whether you prefer vibrant and abstract designs or delicate and intricate patterns, you can design pillowcases that perfectly reflect your style. These personalized touches will transform your bedroom into a cozy sanctuary that truly feels like your own.
So, why settle for ordinary, store-bought pillowcases when you can create one-of-a-kind masterpieces? Let your creative spirit soar and start making your own homemade pillowcases today. Get inspired, gather your materials, and embark on a DIY journey that will not only bring joy and satisfaction but also transform your living space into a haven of personal expression and comfort.
FAQ
Can I make homemade pillowcases easily?
Yes, creating your own homemade pillowcases can be a fun and easy DIY project.
What technique can I use to create watercolor sharpie pillowcases?
One simple and beautiful technique is using Sharpie markers and rubbing alcohol to create a watercolor effect.
How can I personalize pillowcases using Tulip Fabric Markers?
By drawing and coloring directly on the pillowcase with Tulip Fabric Markers, you can create personalized designs.
What technique can I use to design pillowcases with DecoArt Ink Effects?
DecoArt Ink Effects fabric paint offers a unique way to design and customize pillowcases, allowing you to paint your designs on paper and transfer them onto the pillowcase.
What materials do I need for homemade pillowcases?
You will need fabric markers (such as Tulip Fabric Markers or Sharpies), rubbing alcohol (for the watercolor sharpie technique), DecoArt Ink Effects fabric paint (if desired), and white pillowcases. Additional tools like spray bottles and a hot iron may also be needed.
What are the steps to make homemade pillowcases?
the general steps involve coloring or painting the pillowcase, applying any necessary substances (like rubbing alcohol for the watercolor effect), and setting the design with a hot iron or through washing.
Are there any tips for making homemade pillowcases?
Yes, some tips include applying heavier and more saturated colors for a better watercolor effect and making larger drawings to cover the pillowcase and filling in the white space with smaller doodles for a more cohesive design.
How do I care for homemade pillowcases?
Depending on the technique used, the pillowcases may need to be washed before use to set the design. Generally, it is recommended to wash the pillowcases on a gentle cycle and tumble dry low.
How can I customize homemade pillowcases?
You can experiment with different designs, patterns, and colors, and even add names, intricate drawings, or signatures from friends or family as a special touch.
How can I showcase my homemade pillowcases in my bedroom?
You can stack them on your bed, arrange them on a decorative ladder, or even frame them and hang them on the wall.
What can homemade pillowcases add to my bedroom décor?
Homemade pillowcases can add a personal and unique touch to your bedroom décor, reflecting your style and creativity.
Eric Christie stands as a luminary in the bedding industry, with a career spanning nearly four decades since the early 1980s. His journey through the world of bedding has seen him wear many hats – a manufacturer, designer, and retailer, showcasing his versatility and expertise in Read more...