DIY Guide: Making a Pillowcase with Ease

Eric Christie
Owner - Pillows and BedsheetsEric Christie stands as a luminary in the bedding industry, with a career spanning nearly four decades since the early 1980s. His journey through the world of bedding has seen him wear many hats – a manufacturer, designer, and retailer, showcasing his versatility and expertise in Read more...
pillowsandbedsheets.com and its partners may earn a commission if you purchase a product through one of our links
Welcome to our DIY guide on how to make a pillowcase! Whether you’re a sewing enthusiast or a complete beginner, this project is perfect for anyone looking to add a personal touch to their bedroom decor. Making a pillowcase is not only fun and rewarding but also an opportunity to showcase your creativity. And the best part? It’s incredibly easy to do! Let’s get started on creating your own custom pillowcase.
Key Takeaways
- Making a pillowcase is a simple and beginner-friendly sewing project.
- You can choose any fabric you love to make a personalized pillowcase.
- The standard size for a pillowcase is 20 inches by 26 inches.
- Follow our step-by-step tutorial to create a faux cuff for a professional look.
- Don’t be afraid to experiment with different fabrics and add personal touches to your pillowcase.
What size is a standard pillowcase?
A standard size pillowcase measures 20 inches by 26 inches (51 cm by 66 cm). This is the typical size for a standard pillow. It’s important to know the dimensions when cutting your fabric for the pillowcase.
Standard Pillowcase Size
| Pillowcase Size | Dimensions |
|---|---|
| Standard | 20 inches by 26 inches (51 cm by 66 cm) |
| Queen | 20 inches by 30 inches (51 cm by 76 cm) |
| King | 20 inches by 36 inches (51 cm by 92 cm) |
Knowing the dimensions of a standard pillowcase allows for precise cutting of fabric, ensuring a perfect fit for your pillow. Whether you are making a pillowcase from scratch or customizing an existing one, having the correct measurements is key to achieving a professional look.
“The standard size pillowcase measures 20 inches by 26 inches, making it the go-to choice for most standard pillows.”
When purchasing ready-made pillowcases, always check the label to ensure you’re getting the correct size. If you prefer a different size or have specialty pillows, such as queen or king, you can adjust the measurements accordingly. Having the right size pillowcase not only enhances the visual appeal of your bedding but also ensures a comfortable and snug fit for your pillow.
Cutting your fabric
Before you start sewing your pillowcase, you’ll need to cut the fabric to the correct size. This ensures that your pillowcase fits perfectly and looks professional.
For a standard pillowcase, you’ll need two identical pieces of fabric. Each piece should measure 29.5 inches long and 21 inches wide. To make a queen or king size pillowcase, the measurements will vary slightly.
| Pillowcase Size | Length | Width |
|---|---|---|
| Standard | 29.5 inches | 21 inches |
| Queen | 33.5 inches | 21 inches |
| King | 39.5 inches | 21 inches |
Make sure to measure and cut the fabric accurately to achieve the desired pillowcase size. By following these measurements, you’ll have a pillowcase that fits snugly and showcases your craftsmanship.
To get a better idea of the fabric measurements, take a look at the visual representation below:

Fold, Iron, Pin, and Sew
Now that you have cut your fabric, it’s time to fold, iron, pin, and sew the edges of your pillowcase. This step will create a neat finish and secure the fabric in place. Follow these simple instructions to complete this important part of the sewing process.
First, take one of the fabric pieces and fold over the edge that will be the opening of the pillowcase. Fold it over by 3.5 inches, creating a seam for the outer edges. This measurement ensures a clean look and enough space to accommodate your pillow.
Pro tip: Before folding, it may be helpful to measure and mark the 3.5-inch line with a fabric marker or pins to ensure accuracy.

Once folded, use an iron to press down the folded part. This will create a crisp edge and make it easier to sew.
Pro tip: Set your iron to the appropriate heat setting for your fabric to avoid damaging it. If you’re unsure, start with a lower heat and gradually increase if necessary.
After ironing, secure the folded fabric in place by pinning it with straight pins. This will prevent it from shifting or unfolding while you sew.
Pro tip: Place the pins perpendicular to the edge to avoid accidentally sewing over them. Also, make sure the pins are positioned close to the folded edge for maximum stability.
Now it’s time to sew! Using a sewing machine, stitch along the bottom edge of the fabric, sewing the folded part to itself. This creates a faux cuff, giving your pillowcase a polished and professional finish.
Pro tip: For added durability, consider reinforcing the seam by sewing a second line parallel to the first one.
Step 4: Fold, Iron, Pin, and Sew
- Take one fabric piece and fold over the edge that will be the opening of the pillowcase by 3.5 inches.
- Use an iron to press down the folded part, creating a crisp edge.
- Secure the folded fabric in place by pinning it with straight pins.
- Using a sewing machine, sew along the bottom edge of the fabric, sewing the folded part to itself.
| Folding Fabric | Ironing Fabric | Pinning Fabric | Sewing Pillowcase Edges |
|---|---|---|---|
| Fold over the edge by 3.5 inches | Press down the folded part with an iron | Secure the folded fabric with straight pins | Sew along the bottom edge of the fabric |
Repeat with the second piece of fabric
Now that you’ve completed the first fabric piece, it’s time to repeat the steps with the second piece. Follow the same process to ensure consistency and achieve the perfect pillowcase.
Align and pin
Put the right sides of the two fabric pieces together, lining up the cuffs created in step 4. Remember, the cuffs are on the opening side of the pillowcase. Use straight pins to secure the remaining three sides of the fabric, making sure to leave the cuff open.
Sew the edges
Now it’s time to sew the edges of the pillowcase. Using your sewing machine, stitch a straight line around the edges of the three sides of the pillowcase. This will secure the fabric pieces together and create a clean finish.

By repeating the steps with the second fabric piece, you’ll ensure that both sides of the pillowcase are symmetrical and well-crafted. The sewing process may seem repetitive, but it’s essential for achieving a professional and polished result.
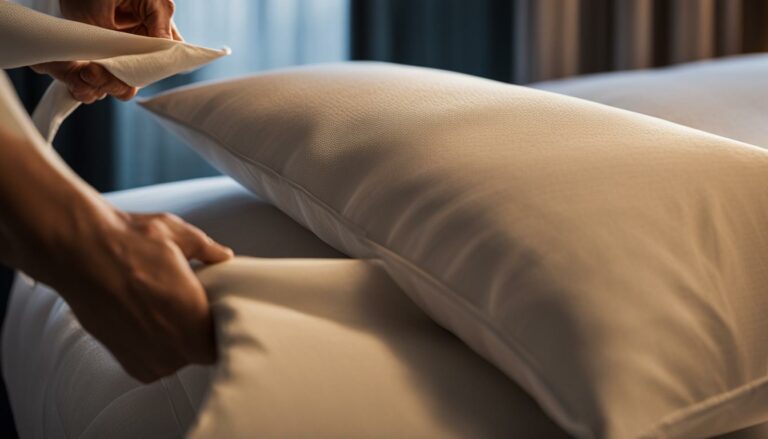
Flip the Pillowcase Right Side Out
Once you have finished sewing the pillowcase, it’s time to flip it right side out. This simple step will bring your pillowcase to life and showcase the beautiful fabric you chose. Follow these easy instructions:
- Starting at the opening, carefully turn the entire pillowcase inside out.
- Gently push out the corners to ensure they are fully formed.
Now that you have flipped the pillowcase right side out, it’s important to give it a final touch to make it look flawless:
- Use an iron to press the pillowcase, smoothing out any wrinkles or creases.
- Pay special attention to the seams and edges, ensuring they lay flat and crisp.
Now, take a moment to admire your finished creation. You have successfully flipped the pillowcase and given it a professional finish. Your handmade pillowcase is now ready to add a personal and stylish touch to your bedroom decor!
Flipping the pillowcase – step by step:
- Begin by unfolding the pillowcase.
- Starting at the opening, carefully turn the entire pillowcase inside out.
- Continue to push the fabric through until the entire pillowcase is right side out.
- Straighten out the corners and edges to ensure a neat appearance.
- Use an iron to press the pillowcase, smoothing out any wrinkles or creases.
| Step | Instructions |
|---|---|
| Step 1 | Unfold the pillowcase. |
| Step 2 | Starting at the opening, carefully turn the entire pillowcase inside out. |
| Step 3 | Continue to push the fabric through until the entire pillowcase is right side out. |
| Step 4 | Straighten out the corners and edges to ensure a neat appearance. |
| Step 5 | Use an iron to press the pillowcase, smoothing out any wrinkles or creases. |

What other pillowcase sizes can you make?
Aside from standard pillowcases, you can also make queen size and king size pillowcases to suit larger pillows. The dimensions for these sizes allow for a more comfortable fit. Let’s explore the dimensions of queen and king size pillowcases:
Queen Size Pillowcase
A queen size pillowcase typically measures 20×30 inches (51cm x 76cm). This size is perfect for queen size pillows and provides ample coverage and support while you sleep. However, keep in mind that these are the recommended dimensions, and you can always adjust them slightly to achieve the desired fit for your specific queen size pillow.
King Size Pillowcase
A king size pillowcase is slightly larger, measuring 20×36 inches (51cm x 92cm). This size is ideal for king size pillows and ensures a cozy and snug fit. Similar to the queen size pillowcase, you can make slight adjustments to the dimensions to accommodate your specific king size pillow.
Now, let’s take a look at a detailed table summarizing the dimensions of standard, queen, and king size pillowcases for easy reference:
| Pillowcase Size | Dimensions (inches) | Dimensions (cm) |
|---|---|---|
| Standard | 20×26 | 51×66 |
| Queen | 20×30 | 51×76 |
| King | 20×36 | 51×92 |
As you can see, each pillowcase size has its own unique dimensions to accommodate different pillow sizes. By knowing these dimensions, you can ensure a proper fit and achieve the desired look for your pillowcases.
Now that you have a better understanding of the various pillowcase sizes, you can confidently create beautiful pillowcases that perfectly fit and complement your pillows.
Can beginner sewers make these pillowcases?
Yes, even beginners can tackle this pillowcase project. It’s a quick and easy sewing project that is perfect for those just starting out. Making your own pillowcases is a great way to learn and practice essential sewing skills while creating something functional and beautiful for your home.
With this beginner-friendly pillowcase tutorial, you’ll be able to make your own pillowcases in no time. The step-by-step instructions are easy to follow, and you’ll be amazed at how quickly you can complete this project.
Not only is this a great sewing project for beginners, but it’s also a fun and rewarding DIY project. You’ll feel a sense of accomplishment as you finish each pillowcase and see the final result.
Whether you’re looking to add custom pillowcases to your own bedding collection or make thoughtful gifts for friends and family, this easy sewing project is the perfect choice. So grab your fabric and sewing machine, and let’s get started on creating beautiful pillowcases!
Add some personal touches to your pillowcase
Now that you know how to make a standard pillowcase, you have the freedom to personalize it. Get creative and add some unique embellishments to make your pillowcase truly one-of-a-kind.
DIY Pillowcase Ideas
Here are some DIY pillowcase ideas to inspire you:
- Embroidery: Add intricate embroidery designs to your pillowcase for a charming and personalized touch.
- Trim: Incorporate decorative trims, such as lace or pom-pom trim, along the edges of your pillowcase to give it a whimsical look.
- Fabric appliques: Cut out fabric shapes and applique them onto your pillowcase to create unique patterns and designs.
- Hand-painted designs: Use fabric paint or fabric markers to hand-paint your own designs on the pillowcase. Let your creativity run wild!
- Monogramming: Personalize your pillowcase with your initials or name using embroidery or fabric paint.
- Printed patterns: Use fabric transfers or stencils to create printed patterns on your pillowcase. Experiment with different designs and colors.
These are just a few ideas to get you started. Feel free to mix and match techniques or come up with your own unique embellishments. Let your pillowcase reflect your personal style and add a touch of personality to your bedroom decor.
Want more DIY pillow ideas?
If you’re feeling inspired by our previous pillowcase tutorial and want to explore more creative pillow projects, we’ve got you covered. Take your pillowcraft skills to the next level with these exciting DIY pillow ideas:
Create a Long Lumbar Pillow
Add a touch of elegance and sophistication to your living room or bedroom with a long lumbar pillow. This trendy pillow style not only provides excellent back support but also serves as a stylish accent piece for your furniture. Experiment with different fabrics and textures to achieve the desired look.
Experiment with Mud Cloth Patterns
Bring a touch of global-inspired decor into your home by experimenting with mud cloth patterns. These unique patterns originating from African mud cloth textiles add a rustic and bohemian vibe to any space. Use fabric markers or paint to create your own mud cloth patterns on plain pillow covers.
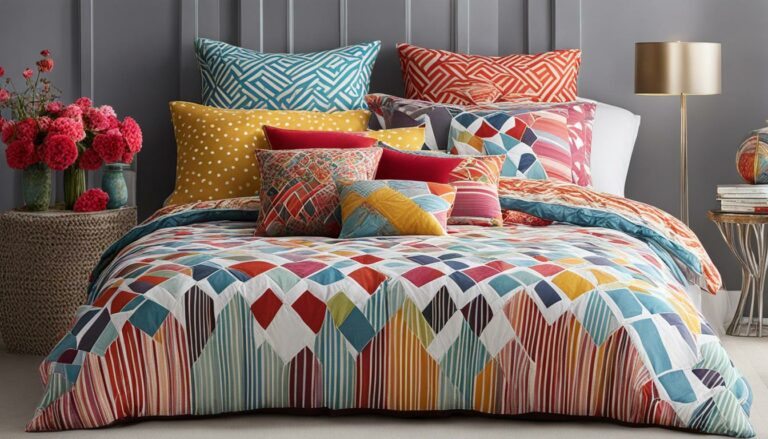
Make Geometric Pillows
Add a modern and geometric touch to your home decor with DIY geometric pillows. Play around with different shapes and color combinations to create eye-catching patterns and designs. Whether it’s triangles, hexagons, or squares, geometric pillows can instantly transform the look of your space.
Try a Trendy Circle Pillow
Step away from the usual square or rectangular shape and try your hand at making a trendy circle pillow. This unique shape adds a playful and whimsical element to your home decor. Use contrasting fabrics or incorporate embroidery details to make your circle pillow stand out.
With these DIY pillow ideas, you’ll have endless opportunities to showcase your creativity and add a personal touch to your home. Get started on your pillowcraft journey and have fun exploring different designs, patterns, and shapes.
Tips for sewing pillowcases with different fabrics
When it comes to making pillowcases, the fabric you choose plays a crucial role in the overall look and feel of the final product. While cotton and flannel are popular fabric choices, don’t be afraid to venture into other options for a unique touch. Consider experimenting with linen, jersey, or even repurposing materials like shower curtains to create one-of-a-kind pillowcases.
Here are some sewing tips to keep in mind when working with different fabrics:
- Adjust measurements: Different fabrics have varying weights and drapes, which can affect the size and fit of your pillowcase. Be sure to adjust the measurements accordingly to ensure a proper fit.
- Use appropriate needles: Choose the right needle for the fabric you’re working with. For lightweight fabrics like linen or silk, use a smaller needle size. Heavier fabrics like denim or upholstery fabrics may require a larger needle size.
- Consider the fabric’s stretch: Fabrics like jersey or knits have a stretch to them, so make sure to account for this when cutting and sewing. You may need to adjust the measurements and use a stretch stitch or a zigzag stitch to accommodate the fabric’s elasticity.
- Pre-wash and iron the fabric: To prevent fabric shrinkage or color bleeding, it’s recommended to pre-wash and iron the fabric before cutting and sewing. This will ensure a better fit and longevity of your pillowcase.
- Test stitches on scrap fabric: If you’re unsure how a particular fabric will behave while sewing, it’s always a good idea to test your stitches on a scrap piece of fabric first. This will help you determine the appropriate tension, stitch length, and thread color.
Remember, the fabric you choose can transform a simple pillowcase into a statement piece. So have fun experimenting with different fabrics and enjoy the creative process!
Expert Tip:
“When sewing with stretchy fabrics like jersey or knits, use a ballpoint needle to prevent snagging or breaking the fabric fibers. This will ensure smooth and even stitches.”
Now that you’re armed with these sewing tips, you can confidently explore a variety of fabric choices to create beautiful and personalized pillowcases.
Continue reading to discover some additional inspiration and ideas for making your own DIY pillows.
Final thoughts on making a pillowcase
Making your own pillowcases is a rewarding and creative way to add a personal touch to your home decor. Whether you’re a beginner or an experienced sewer, this project is a great way to showcase your skills and customize your bedroom or guest room. Handmade pillowcases not only allow you to express your unique style, but they also make for a thoughtful and heartfelt gift.
With DIY home decor becoming increasingly popular, sewing pillowcases is a fun and affordable way to revamp your living space. You have the freedom to choose from a wide range of fabrics, colors, and patterns to match your existing decor or create a charming contrast. Let your creativity soar as you experiment with different textures, finishes, and embellishments to craft pillowcases that truly stand out.
Not only do handmade pillowcases add a personal touch to your home, but they also allow you to enjoy the satisfaction of creating something yourself. Sewing for the home is a fulfilling and fulfilling hobby that allows you to unwind, exercise your creativity, and produce functional and beautiful items. So gather your supplies, set up your sewing machine, and dive into the wonderful world of DIY pillowcase making!
FAQ
What size is a standard pillowcase?
A standard size pillowcase measures 20 inches by 26 inches (51 cm by 66 cm), which is the typical size for a standard pillow.
How do I cut the fabric for the pillowcase?
Start by cutting two identical size pieces of fabric. For a standard pillowcase, each piece should be 29.5 inches long and 21 inches wide. If you want to make a queen or king size pillowcase, the measurements will vary slightly.
What do I do after cutting the fabric?
Create a seam for the outer edges of the pillowcase by folding over the fabric 3.5 inches on the long end, where the opening will be. Iron down the folded part and pin it to keep it in place. Sew the bottom edge of that fabric to itself to create a faux cuff, similar to the look of a French seam.
How do I sew the pillowcase together?
Repeat the folding, ironing, and pinning process with the second piece of fabric. Then, put the right sides of the two fabric pieces together, line up the cuffs created earlier, and pin the remaining three sides together with straight pins, keeping the cuff open. Finally, sew a straight line around the edges of the three sides of the pillowcase.
What do I do after sewing?
Flip the pillowcase right side out and give it a final press with the iron to smooth out any wrinkles. Your pillowcase is now ready to use!
Can I make pillowcases in other sizes?
Yes, you can! A queen size pillowcase measures 20×30 inches (51cm x 76cm), and a king size pillowcase is 20×36 inches (51 cm x 92 cm). These are the recommended dimensions, but you can adjust them slightly to fit your specific pillow size.
Are these pillowcases suitable for beginner sewers?
Yes, even beginners can tackle this pillowcase project. It’s a quick and easy project that can be completed in about 15 minutes. Pillowcases are often recommended as a first or second sewing project for new sewers.
How can I personalize my pillowcase?
To add a personal touch, consider adding trim, embroidery, or fabric appliques to your pillowcase. Get creative and have fun with different design options.
Are there other DIY pillow ideas I can try?
Absolutely! You can make long lumbar pillows, experiment with different patterns like mud cloth or geometric designs, or try making trendy circle pillows. The possibilities are endless when it comes to crafting your own pillows.
Can I use different fabrics for my pillowcases?
Yes, you can experiment with different fabric choices like cotton, flannel, linen, jersey, or even repurpose materials like shower curtains. Just make sure to adjust the measurements accordingly and consider the weight and drape of the fabric when sewing.
Any final thoughts on making a pillowcase?
Making your own pillowcases is a rewarding and creative way to add a personal touch to your home decor. Whether you’re a beginner or an experienced sewer, this project is a great way to showcase your skills and customize your bedroom or guest room.
Eric Christie stands as a luminary in the bedding industry, with a career spanning nearly four decades since the early 1980s. His journey through the world of bedding has seen him wear many hats – a manufacturer, designer, and retailer, showcasing his versatility and expertise in Read more...