Easy Missouri Star Tube Pillowcase Guide

Eric Christie
Owner - Pillows and BedsheetsEric Christie stands as a luminary in the bedding industry, with a career spanning nearly four decades since the early 1980s. His journey through the world of bedding has seen him wear many hats – a manufacturer, designer, and retailer, showcasing his versatility and expertise in Read more...
pillowsandbedsheets.com and its partners may earn a commission if you purchase a product through one of our links
Follow this easy tutorial to learn how to make a beautiful Missouri Star tube pillowcase with just three straight seams. This beginner-friendly project will make you look like a pro. You can use flannel or cotton fabric to create a soft and cozy pillowcase for any season.
Key Takeaways:
- Learn how to make a Missouri Star tube pillowcase with just three seams
- Create a personalized pillowcase using flannel or cotton fabric
- Perfect for beginners and seasoned sewists alike
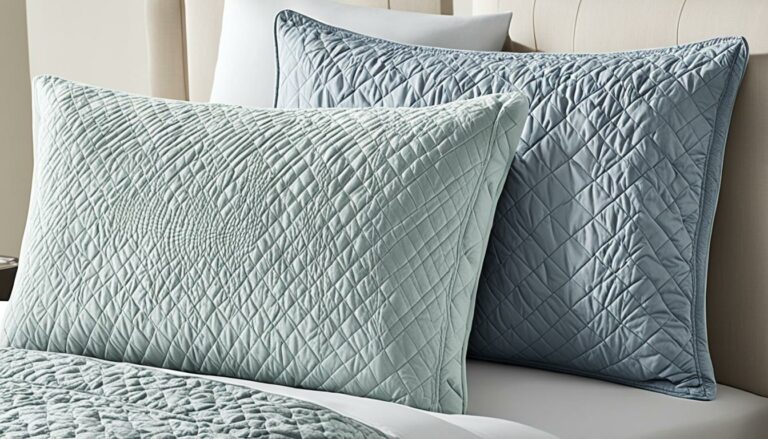
- Add a cozy touch to your bedroom decor with handmade pillowcases
- Explore different fabric prints and colors to create unique designs
What is a Tube Pillowcase?
A tube pillowcase, also known as a rolled, sausage, or magic pillowcase, is a simple sewing project that requires only three seams. This technique involves rolling the main fabric, folding it, and sewing the side and bottom seams. It is a popular method for making pillowcases because it creates a clean and finished look.
With the pillowcase tube technique, you can create beautifully crafted pillowcases in no time. The rolled pillowcase refers to the process of rolling the fabric to create a neat and professional finish. Some also call it a sausage pillowcase, as the rolled fabric can resemble a sausage shape. The magic pillowcase name comes from the seemingly effortless transformation of the rolled fabric into a complete and functional pillowcase.
The pillowcase tube technique simplifies the sewing process and eliminates the need for separate panels or complicated measurements. By using this method, you can achieve perfect alignment, clean edges, and a polished look. Whether you’re a beginner or an experienced sewer, the tube pillowcase technique offers a hassle-free way to make pillowcases with professional-looking results.
Next, let’s dive into the fabric and supplies needed for your tube pillowcase project.
Fabric and Supplies Needed
To make a standard-sized pillowcase, you will need the following fabric and supplies:
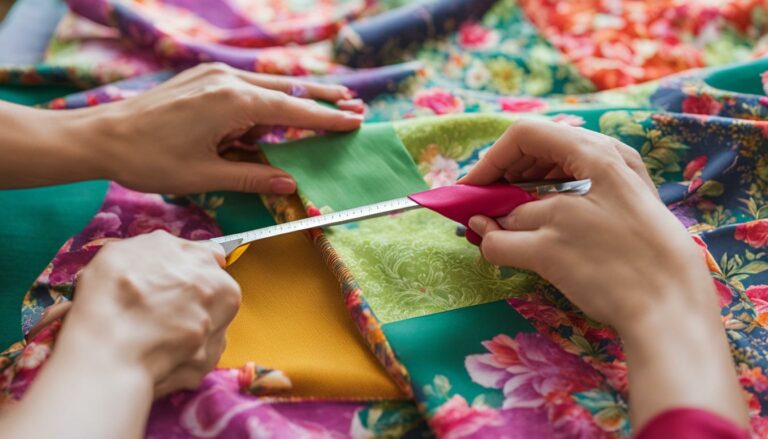
- Fabric: You will need three pieces of fabric for the pillowcase. Cut a 2″ x width of fabric (42″) piece, a 9″ x width of fabric (42″) piece, and a 27″ x width of fabric (42″) piece. Choose fabric prints and colors that match your style and preferences.
- Cutting Mat: A cutting mat is essential for precise fabric cutting. It provides a smooth surface for accurate measurements and cuts.
- Rotary Cutter: Use a rotary cutter to cut the fabric pieces smoothly and effortlessly. It allows for clean and straight lines.
- Sewing Pins: Sewing pins are used to hold the fabric pieces together and prevent shifting during sewing. They ensure accurate alignment and make sewing easier.
- Sewing Scissors: Invest in a good pair of sewing scissors for cutting threads, trimming fabric, and general sewing tasks. Sharp scissors make the sewing process more efficient.
- Sewing Machine: A sewing machine is necessary for sewing the pillowcase seams. Make sure your sewing machine is in good working condition and that you have the appropriate thread and needle for the fabric you are using.
Once you have gathered these fabric and supplies, you are ready to start creating your beautiful pillowcase!
Step-by-Step Tutorial for a Burrito Method Pillowcase
Follow this step-by-step tutorial to create a beautiful pillowcase using the burrito method. This technique will result in a clean and professional finish, and you’ll be amazed at how easy it is to achieve!
Here are the steps:
- Fold and press the 2″ piece of fabric in half lengthwise.
- Lay the 9″ piece of fabric face up and place the 27″ piece of fabric face up on top of it.
- Place the folded 2″ fabric piece on top, aligning the opening at the top.
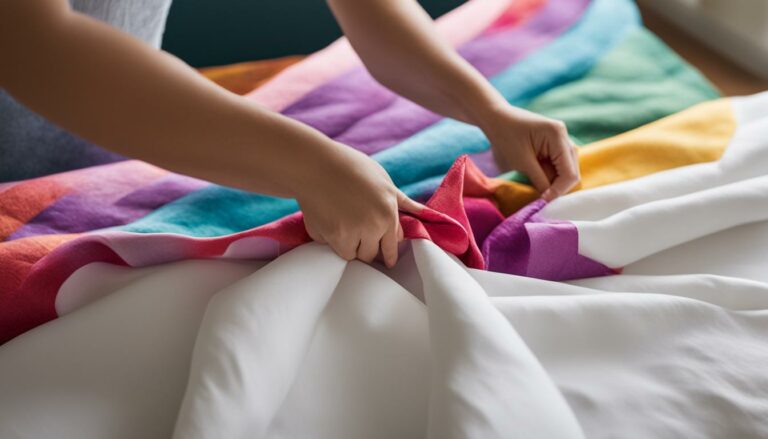
- Roll up the 27″ fabric piece.
- Fold the bottom piece up over the top, making sure all the pieces are lined up along the top edge.
- Pin in place and stitch along the top to create the first seam.
- Turn the tube right side out by pulling the fabric through the open short edges.
- Fold the pillowcase in half, with right sides together, and sew the side and bottom seams to create the second and third seams.
- Turn the pillowcase right side out, and your burrito method pillowcase is complete!
And there you have it! By following these easy steps, you’ll be able to create a beautiful pillowcase using the burrito method. Enjoy making custom pillowcases for yourself, your friends, or as gifts for any occasion.
Variation for a Four-Piece Tube Pillowcase
Create a unique and eye-catching four-piece tube pillowcase by incorporating coordinating colors. This variation adds an extra fabric piece to the mix, allowing you to experiment with different color combinations and patterns. Follow these steps to bring your creative vision to life:
Materials Needed:
- A 27″ x length of fabric piece for the main color
- A 2″ x length of fabric piece for the main color
- A 9″ x length of fabric piece for the coordinating color
- A 3″ x length of fabric piece for the coordinating color
Instructions:
- Start by laying out the main color fabric piece (27″ x length of fabric) face up.
- Place the coordinating color fabric piece (9″ x length of fabric) face up on top of the main fabric.
- Next, position the folded 2″ main color fabric piece on top, aligning the opening at the top.
- Roll up the fabrics, just like in the burrito method pillowcase.
- Fold the bottom piece over the top, ensuring all the pieces are aligned along the top edge.
- Secure the layers with pins and stitch along the top to create the first seam.
- Now, turning the fabric through the open short edges, transform the tube right side out.
- Fold the pillowcase in half, with right sides together, and sew the side and bottom seams to create the second and third seams.
- Finally, turn the pillowcase right side out, and voilà, your four-piece tube pillowcase with coordinating colors is complete!
With this variation, you have the opportunity to showcase your personal style and add visual interest to your home decor. The use of coordinating colors can create a sophisticated and cohesive look. Experiment with different fabric prints and textures to truly make the pillowcase your own.
Check out the visual representation of the steps below:
| Step | Image |
|---|---|
| 1 | |
| 2 | |
| 3 | |
| 4 |
Travel Pillow Pillowcase Instructions
Are you planning a trip and need a pillowcase for your travel pillow? Follow these simple instructions to create a perfectly sized pillowcase that will keep you comfortable on your journey.
- Main pillowcase body fabric – 15″ x 25″
- Border fabric – 8″ x 25″
- Optional trim fabric – 2″ x 25″
Now, let’s get started!
Pillowcase Assembly:
- Lay the main pillowcase body fabric flat on a clean surface.
- Place the border fabric on top of the main fabric, aligning the edges.
- If desired, place the trim fabric on top of the border fabric, aligning the edges.
Sewing the Seams:
- Pin the layers together along the top edge to secure them.
- Using a sewing machine, stitch along the pinned edge, about 1/4 inch from the edge, to create the first seam.
- Remove the pins and press the seam flat.
- With the right sides facing each other, fold the pillowcase in half lengthwise.
- Pin the side and bottom edges together.
- Using a 1/4 to 1/2 inch seam allowance, sew along the pinned edges to create the second and third seams.
And there you have it! Your travel pillow pillowcase is complete, with no exposed raw edges. Now you can rest easy and enjoy a cozy journey.
Fat Quarter Pillowcase Pattern
Fat quarters are a popular choice for making pillowcases due to their versatility and ability to create stunning designs. With this pattern, you can use two focus fabrics and two accent fabrics to create a reversible pillowcase that adds a touch of creativity to your bedroom decor.
The fat quarter pieces for this pattern should be 18″ x 22″ in size, providing ample fabric for your pillowcase project. Whether you prefer bold and vibrant prints or subtle and elegant designs, the fat quarter pattern allows you to showcase your unique style and creativity.
Follow the provided pattern and instructions, and use French seams for a clean and professional finish. French seams not only create a neat appearance but also add extra durability to your pillowcase. Plus, they ensure that there are no exposed raw edges, making the pillowcase comfortable to sleep on.
So, gather your favorite fat quarters, choose coordinating fabrics, and let your imagination run wild as you sew a beautiful and reversible pillowcase using the fat quarter pattern.

Creating a pillowcase with fat quarters opens up a world of possibilities for design and creativity. Whether you mix and match prints, experiment with different color schemes, or create themed pillowcases for different seasons, the fat quarter pattern is a wonderful way to showcase your sewing skills and add a personal touch to your home decor.
Additional Resources and Tutorials
If you’re looking for more inspiration and guidance, there are various online resources and tutorials available. The Missouri Star Quilt Company has a popular tutorial on YouTube for making tube pillowcases. The One-Million Pillowcase Challenge by All People Quilt offers a variety of pillowcase patterns to choose from.
Search the Internet for additional tutorials and patterns using keywords like “magic pillowcase,” “burrito pillowcase,” or “tube pillowcase.” These searches will lead you to numerous websites, blogs, and videos that provide step-by-step instructions and creative ideas for making unique pillowcases.
Whether you’re a beginner or an experienced sewist, these resources will provide you with the guidance and inspiration you need to create beautiful pillowcases that reflect your personal style.
Explore these resources and tutorials to enhance your skills and discover new pillowcase patterns. Happy sewing!
Easy Sewing Projects
If you enjoy simple sewing projects, there are plenty of options to explore. Try making DIY scrunchies, fabric hot pads, or an easy striped quilt. These projects offer opportunities to practice your sewing skills while creating practical and beautiful items.
DIY Scrunchies
Creating your own scrunchies is not only a fun sewing project but also a great way to personalize your hairstyling accessories. You can use different fabrics, from bold patterns to soft textures, to match every outfit or mood. Follow simple tutorials available online to sew scrunchies with elastic inside, ensuring a perfect fit for any hair type.
Fabric Hot Pad
A fabric hot pad is a handy kitchen accessory that adds a touch of style to your cooking experience. Sewn with insulated batting and attractive fabric, you can protect your counter or tabletop from hot pots and dishes. Make your hot pad unique by choosing fabrics that complement your kitchen decor, and enjoy the satisfaction of creating a functional and fashionable item.
Easy Striped Quilt
If you’re ready to take on a slightly bigger project, try making an easy striped quilt. This beginner-friendly quilt pattern involves sewing strips of fabric together, creating a stunning striped design. Choose fabrics in coordinating colors or patterns to achieve a vibrant and eye-catching look. With each quilt stitch, you’ll feel a sense of accomplishment as your masterpiece comes together.

Whether you’re looking to improve your sewing skills or add new pieces to your home or wardrobe, these easy sewing projects are perfect for beginners and experienced crafters alike. Let your creativity shine and enjoy the satisfaction and joy that comes with creating something beautiful and functional with your own hands.
Donating Pillowcases to Charity
Making pillowcases can be a creative and fulfilling activity, but did you know that it can also have a positive impact on others? By donating pillowcases to charity, you can use your sewing skills to bring comfort and joy to those in need.
One organization that accepts donated pillowcases is ConKerr Cancer. They provide pillowcases to children undergoing medical treatments, offering them a sense of comfort and familiarity during difficult times. Donating to ConKerr Cancer is a meaningful way to support these brave children and their families.
To find out how to donate locally, visit the ConKerr Cancer website. They provide information on where to send your donated pillowcases and any specific requirements they may have. Your contribution, no matter how small, can make a difference in the lives of these children.
In addition to ConKerr Cancer, you can also consider donating pillowcases to local hospitals or shelters. These organizations often have a need for bedding items and will appreciate your generosity. Simply contact them to inquire about their donation policies and any specific guidelines for pillowcase donations.
By donating your handmade pillowcases, you are not only sharing your sewing skills but also spreading comfort and happiness to those who need it most. Your act of kindness can make a positive impact and bring a little extra joy to someone’s day.
How to Get Started:
- Research local charities and organizations that accept pillowcase donations.
- Contact the chosen organization to inquire about their donation guidelines and requirements.
- Make extra pillowcases using the sewing techniques you have learned.
- Ensure that the pillowcases are clean, well-made, and free from any stains or damages.
- Package the pillowcases securely to protect them during transportation.
- Ship or deliver the pillowcases to the designated donation center according to the organization’s instructions.
“The best way to find yourself is to lose yourself in the service of others.” – Mahatma Gandhi
Tips for Pillowcase Sewing Success
When it comes to sewing pillowcases, there are a few tips and tricks that can help ensure your project turns out beautifully. Whether you’re a beginner or an experienced sewist, these tips will make the process easier and more enjoyable.
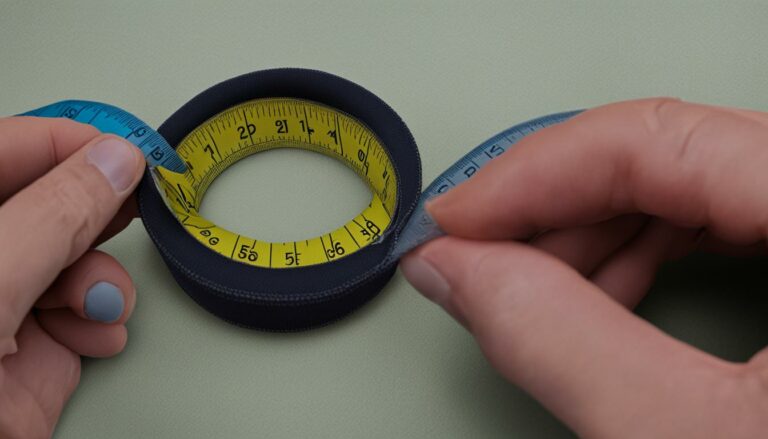
1. Use a Rotary Cutter and Cutting Mat
For precise fabric cutting, invest in a rotary cutter and a cutting mat. These tools allow you to easily cut straight lines and create clean edges for your pillowcase pieces. Say goodbye to uneven fabric edges!
2. Pin Your Fabric Pieces
Before sewing, always pin your fabric pieces together. This helps to prevent shifting and ensures that your seams line up perfectly. Take a moment to pin around the edges, and you’ll thank yourself later for the extra stability.
3. Seam Allowance Matters
When sewing pillowcases, the seam allowance can make a difference in the final result. Use a 1/4 inch seam allowance for the first seam, which attaches the main fabric and the accent fabric. For the second and third seams, use a slightly wider allowance of 1/4 to 1/2 inch. This provides a secure and durable finish.
4. Iron Your Seams
To achieve a professional and polished look, iron your seams flat. Pressing the seams flat ensures a neat appearance and helps the fabric lay smoothly. Your pillowcase will look like it was made by a pro!
5. Get Creative with Fabric
Don’t be afraid to experiment with different fabric prints and colors. Mixing and matching fabrics can result in unique and personalized pillowcase designs. Let your creativity shine through by selecting fabrics that reflect your style and taste.
| Tips for Pillowcase Sewing Success |
|---|
| Use a rotary cutter and cutting mat |
| Pin fabric pieces together before sewing |
| Use a 1/4 inch seam allowance for the first seam |
| Iron the seams flat for a neat finish |
| Experiment with different fabric prints and colors |
By following these sewing tips, you’ll be on your way to creating beautiful pillowcases that are both functional and attractive. Enjoy the process and have fun adding a personal touch to your home decor!
Conclusion
Making a Missouri Star tube pillowcase is a delightful and fulfilling DIY project. Whether you’re a beginner or an experienced sewer, this simple technique allows you to create personalized pillowcases for yourself, your loved ones, or even for charitable organizations. With just a few seams and some beautiful fabric, you can transform the look and feel of your bedroom decor.
By following the step-by-step tutorial provided in this article, you’ll be well on your way to sewing your own stylish pillowcases. The possibilities are endless when it comes to choosing fabric prints and colors, allowing you to showcase your unique personality and creativity.
For those eager to further develop their sewing skills, additional resources and tutorials are readily available online. From the popular Missouri Star Quilt Company tutorial on YouTube to the One-Million Pillowcase Challenge by All People Quilt, you can explore a variety of patterns and techniques to expand your repertoire.
So, why wait? Start your pillowcase-making adventure today and experience the joy of creating something beautiful with your own hands. Whether you’re adding a personal touch to your home or spreading comfort to those in need through charitable donations, sewing Missouri Star tube pillowcases is a rewarding and fulfilling endeavor.
FAQ
What is a tube pillowcase?
A tube pillowcase, also known as a rolled, sausage, or magic pillowcase, is a simple sewing project that requires only three seams. This technique involves rolling the main fabric, folding it, and sewing the side and bottom seams. It is a popular method for making pillowcases because it creates a clean and finished look.
What fabric and supplies do I need?
To make a pillowcase, you will need fabric in various sizes, such as a 2″ x width of fabric (42″) piece, a 9″ x width of fabric (42″) piece, and a 27″ x width of fabric (42″) piece. You will also need a cutting mat, a rotary cutter, sewing pins, sewing scissors, and a sewing machine.
Do you have a step-by-step tutorial for a burrito method pillowcase?
Yes, we have a step-by-step tutorial that guides you through making a burrito method pillowcase using the tube technique. The tutorial includes detailed instructions and images to help you create a beautiful pillowcase.
Can I make a four-piece tube pillowcase?
Yes, you can create a four-piece tube pillowcase by using an additional piece of fabric. The tutorial explains how to assemble the pieces and sew the seams to make a unique and stylish pillowcase.
How can I make a pillowcase for a smaller travel pillow?
To make a pillowcase for a smaller travel pillow, you will need a main pillowcase body fabric measuring 15″ x 25″ and a border fabric measuring 8″ x 25″. The tutorial provides instructions on layering the fabrics, sewing the seams, and creating a finished pillowcase with no exposed raw edges.
Can I use fat quarters to make a pillowcase?
Yes, fat quarters are commonly used to make pillowcases. The tutorial explains how to use two focus fabrics and two accent fabrics to create a reversible look for the pillowcase. The fat quarter pieces should be 18″ x 22″ in size.
Where can I find additional resources and tutorials for making pillowcases?
There are various online resources available for pillowcase tutorials and patterns. The Missouri Star Quilt Company has a popular tutorial on YouTube for making tube pillowcases. The One-Million Pillowcase Challenge by All People Quilt offers a variety of pillowcase patterns to choose from.
Are there any other easy sewing projects I can try?
Yes, apart from making pillowcases, there are a variety of simple sewing projects you can try. DIY scrunchies, fabric hot pads, and easy striped quilts are a few examples. These projects allow you to practice your sewing skills while creating practical and beautiful items.
Are there any charitable organizations that accept donated pillowcases?
Yes, organizations like ConKerr Cancer accept donated pillowcases for children undergoing medical treatments. You can check their website for information on how to donate locally. Making and donating pillowcases to hospitals or shelters is also a meaningful way to share your sewing skills and bring comfort to those in need.
What are some tips for successful pillowcase sewing?
To ensure successful pillowcase sewing, use a rotary cutter and cutting mat for precise fabric cutting. Pin the fabric pieces together before sewing to prevent shifting. Use the appropriate seam allowances. Iron the seams flat for a neat and professional finish. Experiment with different fabric prints and colors to create unique designs.
Eric Christie stands as a luminary in the bedding industry, with a career spanning nearly four decades since the early 1980s. His journey through the world of bedding has seen him wear many hats – a manufacturer, designer, and retailer, showcasing his versatility and expertise in Read more...