Easy Tube Pillowcase Tutorial for Cozy Bedding

Eric Christie
Owner - Pillows and BedsheetsEric Christie stands as a luminary in the bedding industry, with a career spanning nearly four decades since the early 1980s. His journey through the world of bedding has seen him wear many hats – a manufacturer, designer, and retailer, showcasing his versatility and expertise in Read more...
pillowsandbedsheets.com and its partners may earn a commission if you purchase a product through one of our links
Learn how to make a cozy tube pillowcase with this easy tutorial. Create a snug retreat with your own handmade pillowcases using this step-by-step guide. Perfect for refreshing your bedding or making a thoughtful gift. Get ready to get crafty and add a touch of comfort to your sleeping space.
- Follow this easy tutorial to make a cozy tube pillowcase for your bedding.
- Handmade pillowcases add a personal touch to your sleeping space.
- Get creative and customize your pillowcases with different fabrics and trims.
- Tube pillowcases make great gifts for your loved ones.
- Enjoy the comfort and style of handmade bedding with this DIY project.
Materials Needed for the Tube Pillowcase
To make a tube pillowcase, you will need the following materials:
- bernette 05 Academy Sewing Machine
- All-purpose sewing thread
- Fabric:
- Main Body Fabric: 27” x 40”
- Cuff Fabric: 9” x 40”
- Accent Flange Fabric: 2 ½” x 40”
- Rotary cutter
- 6” x 24” Ruler
- Wonder Clips
These sewing supplies will provide everything you need to create your very own tube pillowcase. Make sure to gather all the materials before starting the tutorial, so you have everything at hand.
Now that you have the necessary materials, it’s time to move on to the next step: cutting the fabrics.
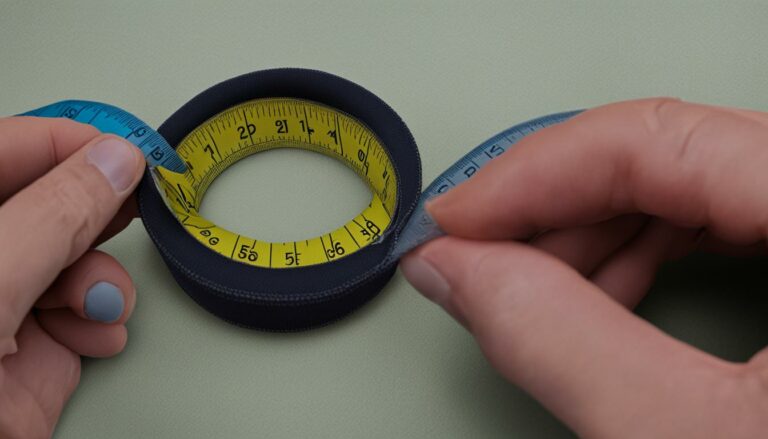
Cutting the Fabrics
Before you start sewing, it’s important to cut the fabrics for your tube pillowcase according to the following measurements:
- Main Body Fabric: 27” x 40”
- Cuff Fabric: 9” x 40”
- Accent Flange Fabric: 2 ½” x 40”
Take your time and ensure that all fabric pieces are cut accurately to achieve the desired size for your pillowcase. Precise measurements will help you create a professional-looking finished product. You can use a rotary cutter and a ruler to make clean, straight cuts.
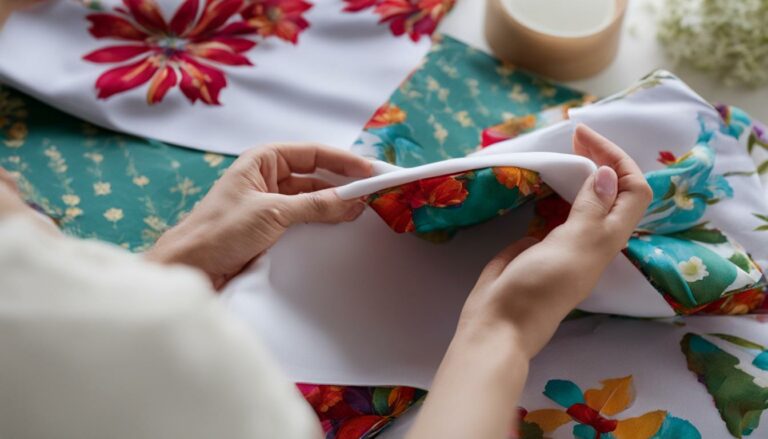
Assembling the Layers
Now that you have all the fabric pieces ready, it’s time to assemble the layers of your tube pillowcase using the burrito method. This technique ensures a clean and professional finish. Follow these steps:
-
Lay the Cuff Fabric with the 40” length positioned horizontally.
-
Place the pressed Accent Flange Fabric on top, aligning the raw edges.
-
Add the Main Body Fabric, right sides together with the cuff/trim, and clip all three layers together.
-
Roll the Main Fabric from the bottom to the top of the cuff, unclip, and re-clip to secure all layers.
By following these steps, you’ll create neat and well-aligned layers for your pillowcase. The burrito method makes it easier to sew the layers together, ensuring a professional-looking result.
Visual Guide: Assembling the Layers
Take a look at the image below for a visual reference of the assembling the layers process:
Quote from Expert Sewer
“The burrito method is a fantastic way to achieve a clean and seamless finish when assembling the layers of a tube pillowcase. It’s my go-to technique for professional-looking results every time!”
– Emma Thompson, Sewing Enthusiast
Now that you have assembled the layers, the next step is to sew them together. In the next section, we will cover the sewing method in detail, ensuring that your pillowcase stays securely in place for years to come.
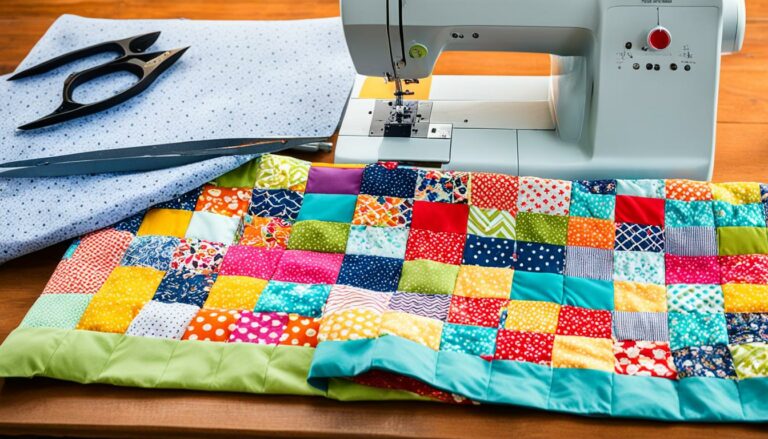
Sewing the Layers Together
Now it’s time to sew the layers of your tube pillowcase together. Get your sewing machine ready and follow these simple steps:
-
Start by stitching along the raw edges of the clipped layers using a 1/2″ seam allowance. This will ensure that your pillowcase is securely held together.
-
Sew down the tube, removing the Wonder Clips as you go. Make sure to sew all the way to the end, ensuring that your pillowcase is fully enclosed.
-
Once you’ve completed the stitching, carefully unfurl the fabric tube to reveal the beautifully sewn cuff and trim.
-
Lastly, give your pillowcase a final touch by pressing it with an iron to remove any wrinkles. This will give your pillowcase a crisp and polished look.

With these simple sewing steps, your tube pillowcase will come together beautifully. Admire your handiwork and get ready to enjoy cozy nights with your handmade pillowcase.
Sewing the Side Seams
Now that you’ve assembled the layers of your tube pillowcase, it’s time to sew the side seams and add the finishing touches. Follow these easy steps:
- Fold the pillowcase in half, ensuring that the right sides are together.
- Clip along the side seam and the non-cuff end to secure the fabric in place.
- Using a 1/2″ seam allowance, sew the side seam, starting from the cuff end and sewing towards the non-cuff end. Make sure to backstitch at the beginning and end to reinforce the seam.
- To reduce bulk and prevent unraveling, trim the seam allowance with pinking shears.
- Turn the pillowcase right side out to reveal the beautiful sewn seams.
- Now, insert a pillow into the pillowcase for a cozy and comfortable nap experience.
By following these steps, you’ll have a professionally finished tube pillowcase that is not only stylish but also durable.

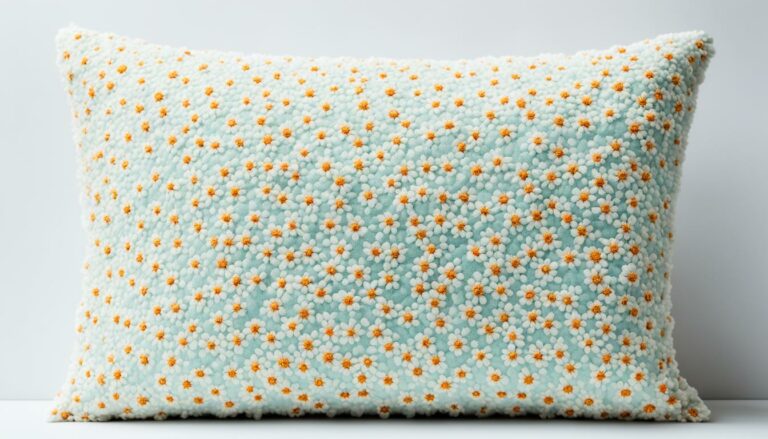
Choosing the Perfect Fabric
The fabric you choose plays a crucial role in the overall look of your pillowcase. Selecting the right fabric can transform a plain pillowcase into a statement piece that adds character to your bedding. By opting for patterns or prints that reflect your personal style, you can create a unique and personalized pillowcase that stands out.

When choosing fabric for your tube pillowcase, consider the following design options:
- Patterns and Prints: Instead of solid colors, explore fabrics with captivating patterns or prints. Floral designs, geometric shapes, or playful motifs can add visual interest and make your pillowcase more eye-catching.
- Color Palette: Choose a bright and vibrant color palette that complements your bedding and enhances the overall aesthetic of your bedroom. Consider the existing colors in your space and select fabrics that harmonize or create contrasting effects.
- Texture: Look for fabrics with interesting textures and tactile qualities. Utilize fabrics with varying thicknesses, weaves, or surface patterns to add depth and dimension to your pillowcase.
Let your creativity shine through in your fabric selection and choose materials that resonate with your personal style and preferences. Don’t be afraid to mix and match different fabrics to create a unique look. With the right choice of fabric, your tube pillowcase will become a standout feature in your bedroom decor.
Making Quick and Easy Flannel Pillowcases
If you’re short on time but still want to create handmade pillowcases, consider using flannel fabric for a quick and easy project. Flannel is a soft, cozy material that is perfect for colder seasons, providing warmth and comfort to your bedding. With minimal sewing required, you can quickly make these flannel pillowcases in just a few simple steps.
Gather Your Materials
Before you begin, make sure you have the following materials:
- Flannel fabric of your choice
- Scissors
- Pins
- Sewing machine
Step 1: Trim the Fabric
Start by trimming off the selvedge (the finished edge of the fabric) from both sides. This will ensure a clean and neat appearance for your pillowcase.
Step 2: Fold and Pin the Fabric
Next, fold the fabric in half lengthwise, with the right sides facing each other. Pin the sides together to secure the fabric in place.
Step 3: Sew the Sides
Using a ½ inch seam allowance, sew along the pinned sides of the fabric using a straight stitch. Backstitch at the beginning and end to reinforce the seams.
Step 4: Hem the Ends
To finish the pillowcase, fold and press the raw edges of the fabric at both ends. Then, fold them over again and sew along the folded edge to create a clean hem.
Your quick and easy flannel pillowcase is now complete! Repeat these steps to make more pillowcases to add warmth and style to your bedding collection.

Flannel pillowcases are not only practical and cozy but also a great way to personalize your sleeping space. Choose flannel fabrics in different colors and patterns to match your bedroom decor or express your unique style.
Customize with Trim or Lace
Looking to add some extra charm and personalization to your tube pillowcase? Consider customizing it with trim or lace. This simple addition can elevate the look of your pillowcase and make it truly unique. Whether you prefer a decorative fabric strip or a delicate lace trim, there are endless possibilities for customization.
To get started, choose a trim or lace that complements your pillowcase fabric. Select something that adds a touch of elegance or whimsy to your design. You can opt for a matching color to create a seamless look or choose a contrasting shade for a bold statement. Experiment with different textures and styles to find the perfect trim or lace that suits your taste.
Once you have your trim or lace, it’s time to add it to your pillowcase. Here’s a step-by-step guide:
- Measure the length of the hem on your pillowcase.
- Cut your trim or lace to match the measured length, adding a few extra inches for allowance.
- Pin the trim or lace along the hem of your pillowcase, ensuring it is aligned evenly.
- Using a sewing machine or needle and thread, carefully stitch the trim or lace onto the hem.
Remember to secure the ends of the trim or lace properly to prevent fraying. Take your time to ensure neat and even stitching, as this will enhance the overall appearance of your customized pillowcase.
By adding trim or lace, you can give your tube pillowcase a decorative and personal touch. Let your creativity shine and make your pillowcase stand out.
Take a look at the example below to see how trim or lace can transform a plain pillowcase:
Enhance your tube pillowcase with trim or lace
| Trim/Lace Option | Description |
|---|---|
| Delicate Lace Trim | Adds a touch of elegance and femininity to your pillowcase. Perfect for a romantic or vintage-inspired look. |
| Floral Fabric Strip | Brings a whimsical and nature-inspired vibe to your pillowcase. Choose a fabric strip with vibrant flower prints for a cheerful and colorful design. |
| Pom-Pom Trim | Creates a playful and fun accent on your pillowcase. Opt for pom-pom trim in bold and bright colors for a vibrant and festive touch. |
| Grosgrain Ribbon | Offers a clean and polished look to your pillowcase. Choose a ribbon in a contrasting color to create a chic and modern contrast. |
With so many customization options available, you can turn a simple tube pillowcase into a statement piece. Let your imagination guide you and have fun adding trim or lace to create a truly personalized and beautiful pillowcase.
Personalizing Pillowcases for Gifts
When it comes to gift-giving, personalized presents are always a hit. With the tube pillowcase tutorial, you have the perfect opportunity to create unique and thoughtful gifts for your loved ones. Adding a personal touch to handmade pillowcases can make them extra special and meaningful.
Consider these creative ways to customize tube pillowcases:
Monograms
Embroidering monograms onto the pillowcases is a classic and elegant way to personalize them. Choose the initials of the recipient and pick a font style that matches their taste. Monograms not only add a touch of sophistication but also make the pillowcases wonderfully personal.
Embroidery
Get creative with embroidery and showcase your artistic flair. You can stitch your loved one’s name, a special quote, or a meaningful design onto the pillowcases. Embroidery adds a handmade charm and makes the pillowcases truly one-of-a-kind.
Fabric Appliques
Another way to personalize the pillowcases is by adding fabric appliques. Cut out shapes, letters, or patterns from different fabrics and sew them onto the pillowcases to create eye-catching designs. Fabric appliques allow you to create unique and playful pillowcases that reflect the recipient’s personality.
Whatever method you choose, the key is to infuse your pillowcases with love and thoughtfulness. Personalized pillowcases make heartfelt gifts for birthdays, weddings, anniversaries, or any other special occasion.
By adding personalization, you transform a simple DIY project into a cherished keepsake. Your loved ones will appreciate the time and effort you put into creating something special just for them. So go ahead, unleash your creativity, and make the perfect personalized gift with the tube pillowcase tutorial.
Conclusion
Creating your own tube pillowcases is a rewarding and fun DIY project that allows you to add a personal touch to your bedding. With just a few simple steps and minimal sewing, you can transform your sleeping space into a cozy and inviting haven. Handmade pillowcases not only bring comfort but also elevate the style of your bedroom.
Express your creativity and choose fabrics that reflect your unique personality. From vibrant patterns to delicate prints, there are endless options to suit your taste. With these easy-to-make tube pillowcases, you can easily refresh your bedding and make it truly your own.
Enjoy the comfort and satisfaction of sleeping on a pillowcase you crafted yourself. These DIY pillowcases are not only a reflection of your creativity, but they also make thoughtful gifts for your loved ones. Whether you personalize them with monograms, embroidery, or fabric appliques, you can create one-of-a-kind presents that will be cherished for years to come.
So why wait? Dive into this tube pillowcase tutorial and start making your own handmade pillowcases today. Experience the joy of crafting beautiful bedding that reflects your style, and transform your sleep space into a cozy haven. Embrace the art of DIY and enjoy the comfort and style of handmade pillowcases.
FAQ
Can I use any sewing machine for this tutorial?
Yes, as long as your sewing machine can handle basic stitching, you can use it to make a tube pillowcase.
Do I need to use a specific type of thread?
It is recommended to use all-purpose sewing thread for this project.
How accurate do the fabric pieces need to be cut?
It is important to cut the fabric pieces accurately to achieve the desired size for the pillowcase.
Are there any alternative methods for assembling the layers?
The burrito method is the recommended method for assembling the layers of the pillowcase in this tutorial. However, you can explore other techniques if you prefer.
Do I need to use Wonder Clips for stitching?
Wonder Clips are recommended for securing the layers before stitching, but you can use pins or other sewing clips if you don’t have Wonder Clips available.
Can I use a different seam allowance for sewing the layers?
The tutorial suggests using a 1/2″ seam allowance. However, you can adjust the seam allowance if desired, as long as you maintain consistency throughout the project.
What is the purpose of using pinking shears to trim the seam?
Pinking shears help reduce bulk and prevent the fabric from unraveling, giving a neat finish to the pillowcase.
Can I sew the side seam with a different stitch instead of using a 1/2″ seam allowance?
While a 1/2″ seam allowance is recommended for the side seam, you can experiment with different stitches if you prefer a different look or need to accommodate a specific fabric type.
How do I insert a pillow into the tube pillowcase?
To insert a pillow, simply turn the pillowcase right side out and slide the pillow into the tube. Adjust the pillow as needed for a snug fit.
Can I use other fabrics besides flannel?
Absolutely! While flannel is suggested for a quick and easy project, you can use a variety of fabrics to suit your taste and style.
Can I add more than one type of trim or lace to the pillowcase?
Of course! Feel free to get creative and add multiple types of trims or lace to personalize the pillowcase as desired.
How can I personalize the pillowcase as a gift?
Consider adding monograms, embroidery, or fabric appliques to make the pillowcase a thoughtful and personalized gift for your loved ones.
Are these pillowcases suitable for different mattress sizes?
These pillowcases are versatile and can be made to accommodate different mattress sizes. Simply adjust the measurements of the main body fabric accordingly.
Eric Christie stands as a luminary in the bedding industry, with a career spanning nearly four decades since the early 1980s. His journey through the world of bedding has seen him wear many hats – a manufacturer, designer, and retailer, showcasing his versatility and expertise in Read more...